
When to Use Lightroom Presets vs. Manual Editing Techniques
Want faster photo edits or more precise control? Lightroom presets and manual editing each have their strengths. Here's the quick breakdown:
- Presets: Great for saving time and ensuring consistency across many photos. Ideal for event photography, social media, or creating a base look.
- Manual Editing: Perfect for detailed adjustments, tricky lighting, or developing a unique style. Best for portfolio images or fine art photography.
Quick Comparison
| Aspect | Presets | Manual Editing |
|---|---|---|
| Time Efficiency | Fast, applies edits instantly | Slower, requires detailed adjustments |
| Consistency | Uniform edits across all photos | Tailored edits for specific images |
| Creative Control | Limited to preset settings | Full control over every detail |
| Best Use Cases | Large photo batches, quick edits | Complex lighting, style development |
Pro Tip: Use presets as a starting point, then fine-tune manually for the best results. Master manual editing first to fully unlock Lightroom's potential.
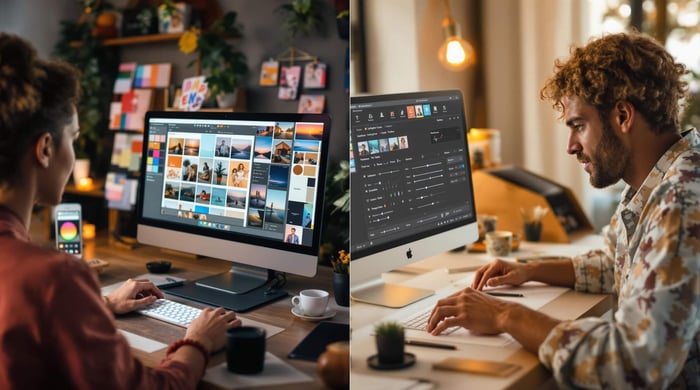
Lightroom Presets Basics
How Presets Work
Lightroom presets are pre-made editing settings that can transform your photos with just one click. Think of them as editing formulas - they combine adjustments like exposure, contrast, highlights, and color balance into a single package. When applied, Lightroom implements all these settings at once, making it a fast and efficient way to edit photos while maintaining a consistent style.
Key Preset Features
Using Lightroom presets can save time and improve your workflow without sacrificing quality. In fact, over 75% of photographers report saving at least 90 seconds per image by using presets[5]. Here’s what makes them so useful:
- Time-Saving: Apply complex edits instantly with a single click.
- Consistency: Keep the same style across an entire photo set.
- Adjustability: You can tweak preset settings to match your personal editing style.
- Batch Editing: Apply edits to multiple photos at once.
- Reusability: Save your favorite editing combinations for future projects.
These features make presets a great tool for photographers looking to simplify their editing process.
Best Uses for Presets
Presets are especially helpful when you need to edit a large number of photos quickly, like in high-pressure situations with tight deadlines. For instance, Hunter and Sarah Photography cut their editing time by 70%, completing an 8-hour wedding shoot in less than 8 hours[6]. Here are some common scenarios where presets shine:
- Wedding Photography: Ensure a consistent look across hundreds of event photos.
- Commercial Projects: Keep product photos aligned with a brand’s visual identity.
- Social Media Content: Quickly edit photos for frequent posting schedules.
"Consistency in your photo edits can elevate your work and save time, especially when working with a large number of images."[8]
To maximize efficiency, organize your presets by style, mood, or photography type. This way, you’ll always have the right preset ready for any project.
Lightroom - Presets vs Profiles - What's the difference?
Manual Editing in Lightroom
Using presets can save time, but manual editing allows for more personalized and precise adjustments.
Manual Editing Steps
Manual editing in Lightroom gives you full control to tweak your photos exactly how you want. With Lightroom's tools, you can adjust specific elements to achieve the desired look:
Global Adjustments: These affect the entire image and can be accessed through the Edit panel. Key settings include:
- Light: Adjust exposure, contrast, highlights, and shadows.
- Color: Change temperature, tint, and saturation.
- Effects: Modify texture, clarity, and reduce haze.
- Detail: Sharpen the image and reduce noise.
- Optics: Apply lens corrections.
- Geometry: Fix perspective issues.
Local Adjustments: These tools let you focus on specific parts of your photo:
- Healing Brush: Remove blemishes or unwanted objects.
- Adjustment Brush: Make precise changes to selected areas.
- Linear and Radial Gradients: Apply adjustments to specific regions with smooth transitions.
To make your workflow smoother, you can right-click the Develop Panel and hide tools you don’t use often [10].
Manual Editing Benefits
Unlike presets, manual editing provides flexibility and customization options:
| Benefit | Description |
|---|---|
| Precise Control | Adjust specific areas with tools like the Adjustment Brush and Radial Filter [10]. |
| Image-Specific Edits | Tailor adjustments to match the unique needs of each photo. |
| Creative Freedom | Experiment and develop your own editing style [7]. |
| Technical Mastery | Gain a deeper understanding of Lightroom’s features and how to use them. |
When to Edit Manually
Manual editing is especially important in certain scenarios. For example, a photo of the Paris skyline required raising shadows to +78 and cropping to highlight the Pompidou Center [9]. Here are a few cases where manual editing becomes essential:
1. Complex Lighting Situations
When dealing with difficult lighting, manual adjustments help recover lost details in both highlights and shadows.
2. Portfolio-Worthy Images
For your best shots, manual editing ensures the highest quality by paying attention to every detail.
3. Style Development
"Presets definitely have their place in editing but relying on them without learning Lightroom can do more harm than good." - Lilly Red Academy [4]
If you’re working on creating a signature style, manual editing lets you explore different techniques and see how each adjustment transforms your image. This hands-on approach is key to crafting a look that makes your work stand out.
These examples highlight why manual editing is often necessary and set the stage for comparing it to preset-based workflows.

Presets vs. Manual Editing
Let’s compare two popular editing approaches - presets and manual editing - and see when each works best. Below is a clear breakdown.
Side-by-Side Comparison
| Aspect | Presets | Manual Editing |
|---|---|---|
| Time Efficiency | Quickly get images 75% done [3] | Takes longer for detailed adjustments |
| Consistency | Uniform edits across all photos [12] | Tailored edits for each image |
| Learning Curve | Easy to use right away [12] | Requires a solid understanding of editing basics |
| Creative Control | Limited by preset settings | Full control over every detail |
| Batch Processing | Ideal for large photo collections | Slower for multiple images |
| Quality Results | May need fine-tuning | Perfect for precise, custom results |
Each method has its strengths depending on the situation. Many photographers combine both, starting with presets for efficiency and moving to manual edits for key shots [7].
"Presets are a fantastic way of speeding up your workflow, or using as a base to get your image 75% of the way there with minimum fuss and time. But they are never the be and end all of your edit, which is why it's important to learn how to edit FIRST, then use presets to speed up the editing steps in your own unique workflow."
- Audrey Ann [3]
When to Use Each Method
Best Uses for Presets:
- Editing large event photo sets
- Quick edits for social media
- Creating a base look with minimal tweaks
- Meeting tight deadlines
Best Uses for Manual Editing:
- Handling tricky lighting conditions
- Perfecting portfolio-worthy images
- Developing a personal editing style
- Fixing challenging exposure issues
Learning manual editing is essential before relying on presets. As Katelyn James explains:
"If you don't understand the foundational basics of editing or Lightroom, we would HIGHLY recommend the Consistency Course first! If you understand how to edit manually and you're ready to speed up that process and harness even more consistency in your work, you're ready for the Preset Process!" [2]
Ultimately, the right choice depends on the image. Presets work well for straightforward daylight shots but often fall short in more complex scenarios, like mixed lighting or high-contrast scenes, where manual editing becomes critical [11].
Using Both Methods Together
Combining presets with manual editing can create a more efficient and precise workflow, blending speed with control.
Presets as Base Edits
Using presets as a starting point can save time while leaving room for detailed adjustments. Photographer Michelle Vantine explains, "For my work, I think of Lightroom presets as more of a starting point than an editing solution" [7].
Here’s how you can integrate both approaches:
- Start with a preset: Apply a preset to quickly set the tone and overall look.
- Fine-tune the basics: Adjust key settings like white balance, exposure, and grain [4].
- Refine specific elements: Focus on local corrections, color grading, and tweaks to clarity or vibrance.
This step-by-step process not only speeds up editing but also helps you refine your style, eventually leading to the creation of your own personalized presets.
Making Custom Presets
Custom presets allow you to build a distinct editing style that reflects your creative vision [14]. The key is to experiment and adjust the settings until they align with your unique preferences.
Here’s a breakdown of essential adjustments for creating custom presets:
| Adjustment Type | Key Settings to Consider | Impact on Workflow |
|---|---|---|
| Basic Settings | Exposure, contrast, saturation | Lays the groundwork for edits |
| Color Grading | White balance, HSL adjustments | Shapes the color palette |
| Detail Enhancement | Sharpening, noise reduction | Ensures high-quality results |
| Tone Curve | Contrast, shadow detail | Sets the overall mood |
Custom presets simplify your workflow by providing a consistent starting point while still giving you the freedom to make creative adjustments [13].
Lightroom Presets vs. Manual Editing: Finding Your Balance
Lightroom presets are great for saving time and keeping your style consistent. On the other hand, manual editing gives you the precision and flexibility to fine-tune every detail of an image. By understanding the strengths of both, photographers can mix and match these approaches to suit their editing needs.
"We can feel rushed at a session or on a wedding day to just jump right in – but it's worth taking an extra minute to dial in settings. You'll be surprised at the massive impact this has on editing consistency in post-processing" [15]
Here’s a quick guide to help you decide when to use presets, manual editing, or a combination of both:
| Editing Scenario | Recommended Approach | Key Benefits |
|---|---|---|
| Large Event Batches | Presets + Minor Adjustments | Saves time while keeping edits uniform |
| Portrait Sessions | Base Preset + Manual Tweaks | Balanced consistency and customization |
| Fine Art Photography | Manual Editing | Full control over creative decisions |
| Commercial Projects | Custom Preset System | Ensures branding consistency |
Blending these methods often gives the best results. As ON1 puts it:
"Rather than making you lazy or doing the work for you, tools like Lightroom presets can make your editing process faster and help you get a better-finished photo while doing the same amount of work" [1]
Focus on mastering manual editing first. Once you’ve got that down, use presets to speed things up without losing your artistic touch.