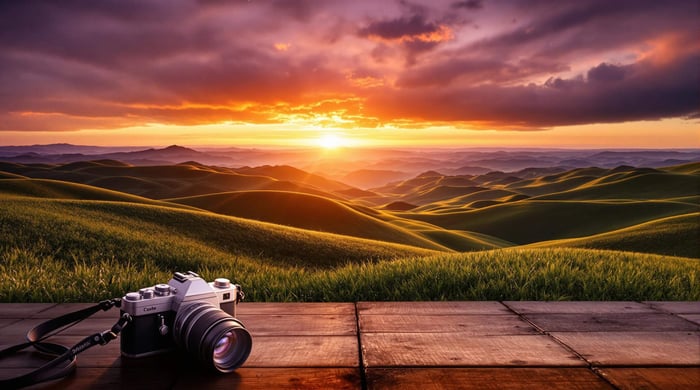

Want your photos to look like movie stills? Here's how to achieve a cinematic look in Lightroom in just 5 steps with Cinematic Photography Framing:
- Set a Cinematic Aspect Ratio: Use ratios like 2.39:1 (Hollywood blockbuster feel) or 16:9 (modern widescreen). Apply it using Lightroom's Crop Tool and plan your composition carefully.
- Improve Composition: Use the rule of thirds, leading lines, symmetry, and negative space to create visual balance and guide the viewer's eye.
- Adjust Clarity, Texture, and Sharpness: Lower clarity (-15 to -30) and texture (-10 to -20) for a soft, film-like feel. Sharpen only the subject while keeping the background subtle.
- Use Color Grading: Add teal to shadows and orange to highlights for that classic Hollywood vibe. Adjust tone curves for depth and contrast.
- Add Final Edits: Apply subtle vignettes and refine mid-tones to tie everything together.
Quick tip: Tools like presets from Presets.io can speed up the process. Start with these settings, then fine-tune to suit your style.
With these steps, you can transform ordinary photos into Cinematic Photography masterpieces that tell a story in a single frame.
Related video from YouTube
1. Set a Cinematic Photography Aspect Ratio
Want to make your photos look like they belong on the big screen? It all starts with picking the right aspect ratio - the relationship between your image's width and height.
Pick the Best Aspect Ratio
Let's break down the most popular Cinematic Photography ratios and what they're good for:
| Aspect Ratio | Best Used For | Visual Impact |
|---|---|---|
| 2.39:1 | Epic landscapes, dramatic scenes | Maximum cinema feel |
| 2.35:1 | Traditional cinema | Classic movie look |
| 16:9 | Modern digital content | Balanced widescreen |
The 2.39:1 Panavision ratio is what you see in most Hollywood blockbusters. It's extra wide for a reason - this format pulls your eyes across the frame, making you feel like you're right there in the scene. Think of it as giving your photos that "big screen" treatment.
Apply Aspect Ratios in Lightroom

Getting that cinema look in Lightroom is simple: Hit 'R' for the Crop Tool, click 'Enter Custom,' and type in '2.39:1'. That's it - you've just given your photo a Hollywood makeover.
Here's a pro secret: When you're working with these super-wide frames, you've got to be smart about where you put your subjects. All that extra space means you need a game plan for your composition - don't just let your subject float around in all that width.
Think of your aspect ratio like a movie theater screen - it's just the canvas. What you paint on it? That's where the real magic happens. Now that you've got your frame set up, let's make sure what goes inside it looks just as good.
2. Improve Composition for Cinematic Photography
Want to make your photos look like they belong on the big screen? Let's go beyond aspect ratios and dive into composition tricks that'll give your shots that movie magic feel.
Use Key Composition Methods
The rule of thirds isn't just a photography basic - it's a secret weapon for Cinematic Photography shots. Think of your frame as a 3x3 grid and place your main elements along those lines. It's like giving your photo perfect balance without trying too hard.
Your frame needs a story, and leading lines are your storytellers. They're like arrows pointing viewers exactly where you want them to look. Spot those natural guides - maybe it's a winding road, the edge of a building, or even the shadow of a fence. Pro tip: Use Lightroom's radial filter to make these lines pop just a bit more.
Ever noticed how Stanley Kubrick loves putting things dead center? That's the power of symmetry. Hit 'O' in Lightroom to bring up the crop overlay and nail that perfect middle placement.
Here's the thing about Cinematic Photography: sometimes you need to forget what you learned about "proper" photography. Sure, rules help - but breaking them? That's where the magic happens.
Work with Negative Space
Think of negative space as your photo's breathing room. It's not empty - it's purposeful. In Lightroom, you can make it work harder for you:
Make the edges fade into darkness, pull back on clarity, or slide in some gradients. It's like directing the spotlight in a theater - you're telling viewers exactly where to look.
Sometimes the most powerful shot is the simplest one. Put your subject right in the center if that's what feels right. Just keep the background clean - use Lightroom's adjustment brush to gently push distracting elements into the shadows or soften them with blur. This creates that laser-focused look you see in movies, where nothing competes with what matters most.
sbb-itb-b27063b
3. Adjust Clarity, Texture, and Sharpness
Use Clarity and Texture Sliders
Want to nail that film-like look? It's all about getting the softness just right. Pull your Clarity down between -15 and -30 to create that dreamy, Cinematic Photography feel. Then, drop the Texture to -10 or -20 - this smooths things out while keeping the image's core details intact.
Here's a pro tip for portrait shots: Start by setting Clarity to -20 for that overall soft glow, then dial Texture back to -15 on skin areas. This combo keeps facial features looking natural while giving you that movie-style finish you're after.
"The cinematic look often involves softening images to give them a more film-like quality, which can be achieved by reducing clarity and texture."
Make Sharpness Adjustments
When it comes to cinematic sharpness, it's not about making everything crystal clear. Think of it like a movie scene - some parts pop while others blend into the background.
Here's how to nail it: Keep your main subject sharp (around 40-50), but let the background go soft. Use Lightroom's masking tool to add subtle edge definition where it counts. This creates that eye-catching depth that makes viewers feel like they're looking at a movie still.
Need a shortcut? Check out the cinematic presets on Presets.io - they've got these settings pre-configured to save you time.
Now that you've got your clarity, texture, and sharpness sorted, let's move on to the color work that'll really make your images pop with cinematic flair.
4. Use Color Grading for Cinematic Effects
Want to give your photos that big-screen movie look? It's all about smart color choices and the right contrast tweaks.
Add Complementary Colors
The orange-teal combo is the secret sauce behind that Hollywood look. Here's how to nail it: First, pull back the saturation a bit to create a clean starting point.
Head to Lightroom's Color Grading panel and work some magic: Add teal to your shadows (start with -15 saturation) and warm orange tones to your highlights (+10 to +15 saturation). This creates depth that screams "movie scene." For natural-looking skin, add a touch of warmth to the midtones.
"Desaturating colors and applying tonal shifts are key to crafting a cinematic mood."
Use the Tone Curve for Depth
The Tone Curve isn't just another slider - it's your ticket to that pro-level contrast. Create a subtle S-curve by bringing down the shadows and lifting the highlights. Then fine-tune those midpoints so you don't lose any important details.
Want to take it further? Play with individual color channels. Try boosting reds in the bright areas while toning down blues in the darker spots. This creates subtle but impactful color separation.
Just starting out? Check out Presets.io - they've got cinema-style presets that show you how the pros do it. Use these as your training wheels while you learn the ropes, then put your own spin on things.
5. Add Final Edits for a Cinematic Style
Let's put those finishing touches on your photo to nail that movie-quality look.
Add Vignettes for Emphasis
Here's a pro tip: less is more with vignettes. Pop open Lightroom's Vignettes panel and start small - try -15 for the edge shadows. Think of it like adding salt to a dish - you want just enough to enhance, not overpower.
Want more control? Grab a radial gradient. It's like having a spotlight you can place exactly where you need it. You can fine-tune the feathering to match your subject's position, making the effect look natural and intentional.
Review and Refine Edits
Now's the time to step back and look at the big picture. Squint at your image - it's an old photographer's trick that helps you spot areas needing tweaks.
Your mid-tones make or break that film look, so pay extra attention there. Try adding different colors to your shadows and highlights - it's like giving your photo its own movie color palette.
Quick check list:
- Make sure your clarity and texture aren't too sharp
- Check if your vignette plays nice with your color grading
- Keep an eye on those mid-tones
Think about your favorite movies - notice how they use subtle shadows and contrast to pull your eyes exactly where they want them? That's what we're after. Your edits should work together like a well-orchestrated scene, each element supporting the others without stealing the show.
If something feels off, start with small adjustments. It's better to dial back your vignette than mess with your carefully crafted color grade. Remember: you're not just editing a photo - you're telling a story through your image.
Conclusion
In cinematic photography, each frame needs to pack a punch and tell its own story. After working through these five key steps in Lightroom, you'll transform your regular photos into eye-catching, movie-style images that grab viewers and pull them into your visual story.
It all starts with picking the right aspect ratio. Then you'll move through composition tweaks, clarity adjustments, and color grading to build your cinematic look. The color grade gives your images that movie-like depth, while subtle touches like a gentle vignette pull everything together.
"Movies uniquely capture life's beauty, and with Lightroom, you can bring that cinematic essence into your photography."
Need a jump start? Check out Presets.io - they've got cinematic presets that can kick off your editing process.
Here's the thing about getting that movie look: small tweaks make a big difference. Start with gentle adjustments to contrast, highlights, and shadows. Then fine-tune until everything clicks. It's all about finding that sweet spot between too much and too little.
The final test? Your image should feel like a frame pulled straight from a movie. These techniques work their magic on everything - from sweeping landscapes to intimate portraits to street shots. They'll help you create photos that don't just show a scene - they tell a story.