
Checklist for Organizing Lightroom Presets
Organized Lightroom presets save you time, improve your workflow, and help maintain a consistent editing style. Here’s how to get started:
- Back Up Your Presets: Export them to an external drive or cloud storage to avoid losing your work.
- Declutter Unused Presets: Remove presets you no longer use or create a “Maybe” folder for uncertain ones.
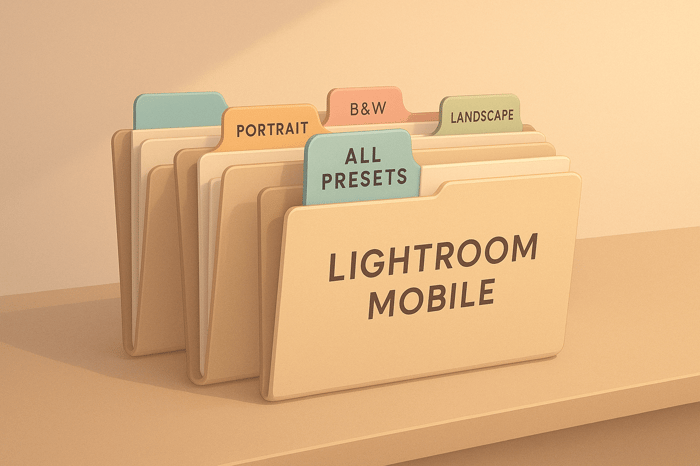
- Set Up a Folder System: Categorize presets by types like Portrait, Landscape, or Black & White, and add subfolders for specific styles.
- Name and Sort Presets: Use clear, descriptive names and prioritize frequently used presets with numbered prefixes.
- Sync Across Devices: Ensure your folder system is consistent on both desktop and mobile for seamless access.
- Maintain Regularly: Review monthly to test new presets, remove duplicates, and keep everything functional.
With these steps, you’ll spend less time searching and more time editing. Start organizing today for a smoother workflow.
How to Create FOLDER for PRESETS in Lightroom
Step 1: Get Ready to Organize
Before diving into reorganizing your Lightroom presets, take some time to ensure everything is safe and well-prepared. This will help you avoid losing any important data along the way.
Back Up Your Presets
The first step is all about protecting your work. Backing up your presets ensures you have a safety net in case anything goes wrong. Here's how to do it:
- Export your presets to an external drive or upload them to cloud storage for easy access.
- Take screenshots or make notes of your current folder structure so you can recreate it if needed.
- Test your backups by opening a few preset files to confirm they work correctly.
Once you've secured your backups, you're ready to move on to the next step: decluttering your presets.
Declutter by Removing Unused Presets
Now it's time to clean up! Go through your presets and identify the ones you no longer use. Consider removing a preset if it:
- Hasn't been used in a long time.
- Produces effects that are too similar to other, more effective presets.
- No longer fits your editing style.
- Consistently gives you results you don't like.
If you're not entirely sure about some presets, create a “Maybe” folder for them. After a trial period, if you still haven't used them, it might be time to let them go.
Step 2: Set Up Your Folder System
Once you've decluttered your presets, it's time to organize them into a folder system that makes finding the right one a breeze.
Desktop Folder Setup
Here’s how to create a folder structure that works:
- Start with Main Categories
Think about the types of photography you shoot most often and create broad categories like:- Portrait
- Landscape
- Wedding
- Black & White
- Cinematic
- Add Subfolders for Styles
Within each category, break things down further by specific styles or techniques. For example, under "Portrait", you could include:- Natural Light
- Studio
- Film Emulation
- Fashion
Pro Tip: Add a "Favorites" folder at the top level. This is your go-to spot for the presets you use all the time, saving you from scrolling through endless options.
To keep things consistent, sync this folder system across all your devices.
Syncing to Mobile Devices
Want your folder setup to work seamlessly on mobile? Here’s what to do:
- Log in to Lightroom Desktop using your Creative Cloud account.
- Go to the Presets panel in the Develop module.
- Right-click on a folder and select Export Preset Group.
- Open Lightroom on your mobile device and tap the Presets icon.
- Import the preset groups, keeping the same folder structure intact.

Step 3: Name and Sort Your Presets
Once your folder system is ready, the next step is to create a clear naming strategy to streamline your workflow even further.
How to Name Your Presets
A consistent naming approach makes it much easier to identify presets at a glance. Here’s a simple structure you can follow:
- Include the preset’s style and key features in the name. For example:
- Cinematic_Teal_01
- Vintage_Fade_Light_02
- Portrait_Warm_Matte_03
- Add a two-digit version number to keep track of variations or updates:
- Wedding_Bright_01
- Wedding_Bright_02
- Wedding_Bright_03
- Stick to letters, numbers, and underscores to keep names clean and easy to read.
Organize by Usage Frequency
Sorting your presets based on how often you use them can save you loads of time. Here’s how:
- Use numbered prefixesto prioritize your most-used presets:
- 01_Portrait_Natural
- 02_Portrait_Studio
- 03_Portrait_Fashion
- Group similar presetsby style for better organization. For instance:
- Cinematic: Cine_Cool_01, Cine_Warm_02
- Vintage: Vintage_Film_01, Vintage_Fade_02
- Minimalist: Mini_Clean_01, Mini_Bright_02
Quick Access Tips
- Create dedicated folders like Favorites or Current for your most-used or seasonal presets.
- Move any temporary or trending presets into these folders for easy access during specific projects.
Step 4: Keep Your Library Clean
Keeping your preset library organized and functional is essential for a smooth workflow. Set aside time to regularly check and maintain your presets.
Monthly Library Check
Make it a habit to review your presets every month. Here’s how:
- Evaluate New Presets: Test any new presets to ensure they work properly. If you find some that you rarely use, consider archiving them to reduce clutter.
- Eliminate Duplicates: Look for duplicate presets by comparing file names or settings, and remove any unnecessary copies.
This simple routine helps you avoid common problems that could slow down your editing process.
Fix Common Preset Problems
If you encounter issues during your monthly review, here’s how to tackle them:
Missing Presets
Can’t find a preset? Check the default directories:
- Windows:
Users/[Username]/AppData/Roaming/Adobe/Lightroom/Develop Presets - Mac:
Users/[Username]/Library/Application Support/Adobe/Lightroom/Develop Presets
If the presets are missing, reinstall them to restore functionality.
Sync Issues Between Desktop and Mobile
When presets fail to sync across devices, ensure you’re signed in with the same Adobe account on all platforms. Also, double-check that cloud sync is enabled on every device.
Conclusion: Better Editing Through Organization
Having a well-organized preset library can make your editing process smoother and more enjoyable. By keeping your presets neatly categorized, you can focus your energy on being creative rather than digging through a chaotic collection.
But let’s be honest - organization isn’t something you do once and forget about. It’s an ongoing effort that grows and changes alongside your editing style. Setting aside a little time each month to tidy up your library ensures it stays efficient and easy to navigate.
The key to a seamless workflow lies in combining regular upkeep, clear naming conventions, and structured folders. This thoughtful approach helps you stay productive and keeps your creative process flowing. Make it a habit to review and trim your presets regularly - it’s a small effort with big rewards.
FAQs
How can I back up my Lightroom presets to ensure they’re safe and won’t get lost?
To make sure your Lightroom presets are secure, it's a good idea to back them up regularly. First, locate your presets folder in Lightroom by heading to the Preferences menu and navigating to the Presets tab. Once you find the folder, copy it to an external hard drive, upload it to cloud storage, or do both for extra protection.
To keep things organized, set up a clear folder structure in your backup location. You might want to label folders by preset type or collection, so you can easily find what you need later. By updating your backups regularly, you'll ensure all your latest presets are safe and sound, letting you focus on your editing without worry.
How can I decide which Lightroom presets to keep and which to remove?
When deciding which Lightroom presets to keep, start by taking a closer look at the ones you rely on the most. Stick to presets that match your editing style, improve your workflow, or consistently deliver results you’re happy with. Let go of duplicates, outdated options, or presets that no longer fit your needs.
To make things even smoother, organize your presets into well-labeled folders. You might group them by style - like cinematic or vintage - or by purpose, such as portraits or landscapes. By keeping only the presets you actually use, you’ll cut down on clutter and make your editing process faster and more efficient.
How can I keep my Lightroom presets organized and consistent across my desktop and mobile devices?
To keep your Lightroom presets organized across all your devices, start by setting up a clean, logical folder structure on your desktop. Use clear and descriptive folder names that match the preset's style or purpose, like "Cinematic", "Vintage", or "Portraits". Once you've sorted everything, sync your presets with Adobe Creative Cloud. This step ensures they're always within reach, whether you're editing on your computer or your phone. Plus, it keeps things tidy, saving you time when searching for the perfect preset.
Want to grow your preset collection? Check out professionally crafted options on platforms like Presets.io. They offer a range of high-quality presets tailored to different editing styles, helping you stay both efficient and creative in your editing process.