
How to Use Presets to Create a Signature Look for Your Photography Business
Want to save time editing photos and create a consistent, recognizable style? Presets can help.
Presets are pre-set editing tools in Lightroom that apply specific adjustments to your photos with one click. They help photographers:
- Save Time: Batch edit entire galleries in minutes instead of hours.
- Build a Consistent Brand: Create a unique, cohesive style that makes your work stand out.
- Simplify Workflow: Apply adjustments like exposure, contrast, and tones effortlessly.
Whether you shoot weddings, portraits, or commercial photos, prearranged settings can streamline your editing process while defining your visual identity. This guide explains how to choose, customize, and use prearranged settings effectively to elevate your photography business.
What Presets Are and Why They Matter for Branding
Understanding Presets
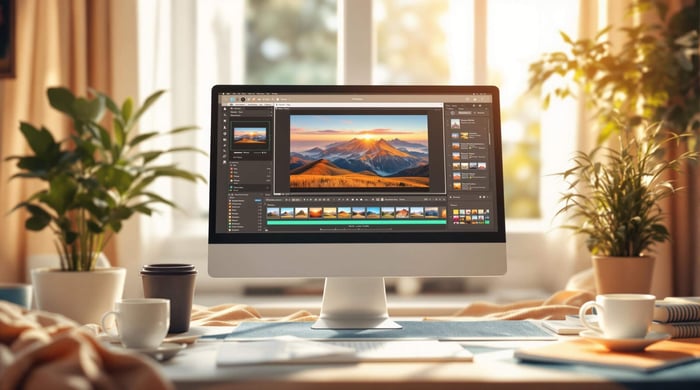
Lightroom presets are pre-set editing configurations that modify elements like exposure, contrast, and tones to create a specific look with just one click. Think of them as digital shortcuts that adjust various aspects of an image to deliver consistent results. They not only speed up your editing process but also help establish a unified, professional brand identity.
Presets help [photographers] achieve a desired look without going through an entire editing process. It's similar to applying an image filter on Instagram or Snapchat - except prearranged settings are there to do one job - make your photos look beautiful [1].
Using Presets to Build a Recognizable Style
Different preset styles can shape your brand's overall tone, whether you're aiming for something romantic, artistic, or realistic. Here's a quick breakdown of how certain styles align with specific photography niches:
| Style Category | Brand Impact | Best Used For |
|---|---|---|
| Light & Airy | Timeless, romantic feel | Wedding and lifestyle photography |
| Moody & Dramatic | Artistic, emotional tone | Portrait and fine art photography |
| Natural Tones | Realistic, grounded aesthetic | Documentary and commercial work |
| Retro Grain | Nostalgic, vintage vibe | Fashion and editorial shoots |
Presets are essential for maintaining a consistent style across your portfolio. They allow photographers to apply the same adjustments across multiple images, helping clients immediately recognize your unique look - whether it's soft, dreamy wedding photos or bold, dramatic portraits.
Customizing prearranged settings is another way to make sure they align perfectly with your creative vision. This ensures your work resonates with your audience while staying true to your brand. Many professional photographers rely on prearranged settings to streamline their workflow, editing hundreds of photos quickly while keeping their visual identity intact [2].
Once you understand how prearranged settings shape your style, the next step is selecting and fine-tuning them to reflect your creative goals.
How to Choose and Adjust Presets for Your Style
Picking the Right Preset Style
Choosing the right preset style depends on your photography genre and the audience you're aiming to reach. Each preset style creates a specific mood and atmosphere that can shape your brand's visual identity. For instance, cinematic settings are great for creating dramatic and emotional visuals, while natural settings are ideal for capturing clean, true-to-life moments.
| Preset Style | Best Uses & Features |
|---|---|
| Cinematic | Perfect for wedding films and storytelling; offers rich contrast and film-inspired tones |
| Natural | Ideal for lifestyle and portraits; delivers clean colors and balanced exposure |
| Moody | Works well for fine art and editorial pieces; emphasizes deep shadows and a dramatic feel |
| Vintage | Suited for fashion and creative projects; provides retro tones and subtle grain effects |
It's important to test how your chosen prearranged settings perform in different lighting conditions, such as indoor versus outdoor settings. Many professionals create separate versions of their settings for these scenarios to maintain consistent results. Once you've found a preset style that fits your brand, the next step is making it your own.
Adjusting Presets to Match Your Vision
Fine-tuning prearranged settings is essential for developing a style that defines your brand. Start by applying a preset to a sample image, then tweak settings like exposure, contrast, and color balance to align with your creative vision. The aim is to enhance your photos while keeping them natural and in line with your brand's identity.
Pay attention to your signature colors and avoid over-editing, which can detract from the image's authenticity. Test your adjustments on a variety of photos to ensure the prearranged settings are versatile and consistent. Customizing presets helps create a unified look that your audience will recognize as yours.
For better results, consider making preset variations for different lighting conditions. For example, you might create an "Outdoor Version" with slightly brighter settings and an "Indoor Version" with adjusted shadows. Both should still clearly reflect your brand's style.
3 Reasons to CREATE YOUR OWN Lightroom PRESETS


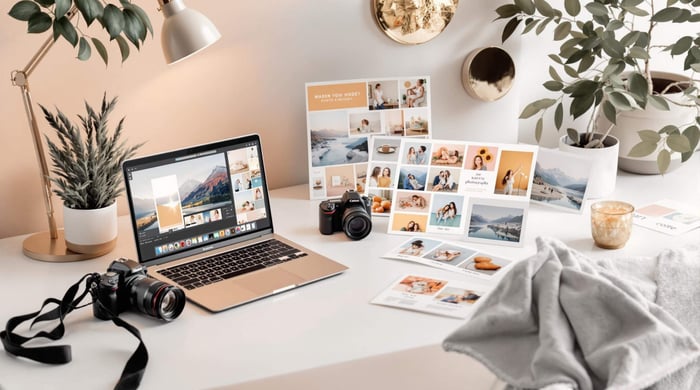
Using Presets to Save Time and Stay Consistent
Presets can simplify your editing process, saving time while keeping your photography aligned with your brand's style.
How to Apply Presets Step by Step
To get the most out of prearranged settings in Lightroom's Develop module, follow these steps:
- Import and Assess: Start by organizing your photos into collections. Look at the lighting in each image to prepare for applying prearranged settings.
- Apply and Adjust: Choose a preset and test it on one image. Fine-tune the intensity based on the lighting - dial it down for bright outdoor photos, leave it stronger for indoor natural light, and tweak it for studio or mixed lighting.
Once your prearranged settings are applied, the key is maintaining a consistent look across all your projects to reinforce your brand.
Keeping a Consistent Look Across Projects
Consistency is essential for professional photographers. Here’s how to ensure your photos always reflect your brand:
- Create Variations: Adjust your main preset for different lighting scenarios while keeping the core style intact.
- Batch Edit: Apply your preset to an entire session with just a few clicks to save time and stay uniform.
- Review Edits: Double-check your edits, paying close attention to skin tones and key colors that define your brand.
"Using batch edits in Lightroom can apply a preset to an entire gallery in just a few clicks, significantly streamlining the editing workflow while maintaining consistency across all images." [2]
Advanced Ways to Customize and Use Presets
Once you're comfortable with basic preset adjustments, it's time to dive into more advanced techniques that can take your editing to the next level and make your work stand out.
Fine-Tuning Presets for Better Results
AI tools like Adobe Sensei can analyze your images and suggest exposure and color corrections, giving you a strong starting point for customization [1]. These tools help make your adjustments more precise and efficient.
To enhance your prearranged settings further, focus on local adjustments. For example:
- Use radial filters to brighten faces and balance exposure.
- Apply graduated filters to handle tricky lighting situations.
- Make selective color adjustments to ensure skin tones stay consistent.
Lightroom’s "Before" view is a great way to track your progress and ensure your edits look natural.
Combining Presets for New Styles
Blending prearranged settings is a creative way to develop unique looks that set your work apart. The key is layering complementary presets for a fresh effect. Here's an example:
| Base Preset | Enhancement Preset | Result |
|---|---|---|
| "Sunday" (Light & Airy) | "Pro Moody" | Adds dramatic depth with bright highlights |
Start by applying combinations subtly - keep effects below 50% strength to avoid over-editing. For corporate projects, create variations that balance professionalism with your personal style, especially for headshots or product shots.
These techniques not only improve your photos but also help you build a distinctive visual style that clients will recognize. Next, we’ll look at where you can find top-tier prearranged settings to expand your editing toolkit.
Where to Find High-Quality Presets
Finding the right settings is key to creating a consistent style that aligns with your brand and resonates with your audience. Here’s a look at some trusted platforms where you can find professional-grade options for various photography needs.
Presets.io
Presets.io offers a wide range of prearranged settings for Lightroom, Capture One, and Luminar NEO. The platform updates its collection weekly and provides clear installation instructions, making it easy to get started. With well-organized categories, you can quickly find settings that suit your creative vision.
Other Trusted Sources
Creative Market is another reliable option for high-quality settings. Notable creators like KIINPRESETS, known for their natural tones, and SlowStudio, offering branding-focused filters, are worth exploring.
When choosing a preset source, keep these factors in mind:
| Factor | Importance |
|---|---|
| Software Compatibility | Make sure the prearranged settings work with your preferred editing tools. |
| Return Policy | Protect your purchase in case the settings don’t meet your expectations. |
| Customer Support | Assistance with installation or troubleshooting can save you time. |
| Preview Options | Being able to see the prearranged settings in action before buying is a big advantage. |
For professional use, investing in premium bundles can be a smart move. For instance, Jenny Wu Photography's Branding Lightroom Preset Bundle offers 10 tools designed for consistent branding, priced at A$80.00 [3].
These platforms and creators provide the resources you need to elevate your photography and make your work stand out in a crowded market.
Conclusion: Create Your Photography Style with Presets
Using prearranged settings can simplify the process of defining your photography style while saving time and ensuring a consistent look. They’re a practical way to establish a visual identity that helps your work stand out and supports your photography brand.
The key is finding the balance between efficiency and creativity. For example, tools like the Jenny Wu Photography's Branding Lightroom Preset Bundle offer a range of options designed to help photographers maintain a cohesive look across their projects [3]. These settings can serve as a strong starting point for building your personal style while leaving room for customization.
Prearranged settings are more than just time-savers - they help with consistent branding and can even boost client satisfaction. However, they’re not a replacement for creativity. When used alongside your technical skills and artistic vision, they can streamline your workflow and strengthen your brand identity.
Your photography style should align with both your creative vision and business goals. Whether you focus on weddings, portraits, or commercial projects, the right preset strategy ensures consistency while allowing for artistic freedom.
Take advantage of these settings to refine your photography business. Experiment with different options, explore platforms you trust, and tweak your workflow to bring your vision to life. With the right approach, you can create a brand that truly connects with your audience.