
Table of Contents
- Cinematic Presets vs Manual Lighting Adjustments
- How to Make Your Photos Look CINEMATIC in Lightroom | My Workflow
- What Are Cinematic Presets?
- Manual Lighting Adjustments Explained
- Key Lightroom Tools for Manual Adjustments
- Benefits of Manual Adjustments
- Drawbacks of Manual Adjustments
- Workflow Speed Comparison
- Time Required: Presets vs Manual Editing
- Batch Editing with Presets
- Using Presets and Manual Adjustments Together
- When to Use Each Method
- Conclusion
- FAQs
Cinematic Presets vs Manual Lighting Adjustments
When editing photos in Lightroom, you have two main approaches to achieve a cinematic look: presets and manual adjustments. Here's a quick breakdown:
- Presets: Pre-made settings that apply a cinematic style with one click. Fast and consistent, they're ideal for large batches of photos or when time is limited. However, they may require tweaks for lighting or skin tones.
- Manual Adjustments: A hands-on method where you fine-tune every detail, like exposure, contrast, and color balance. This approach offers more control but takes longer and requires practice.
Best Use Cases:
- Use presets for speed, consistency, and straightforward edits (e.g., weddings or social media).
- Opt for manual adjustments when precision is needed, such as for portraits, complex lighting, or creative projects.
Pro Tip: Many photographers combine both methods - start with a preset as a foundation and refine manually for the best results.
How to Make Your Photos Look CINEMATIC in Lightroom | My Workflow
What Are Cinematic Presets?
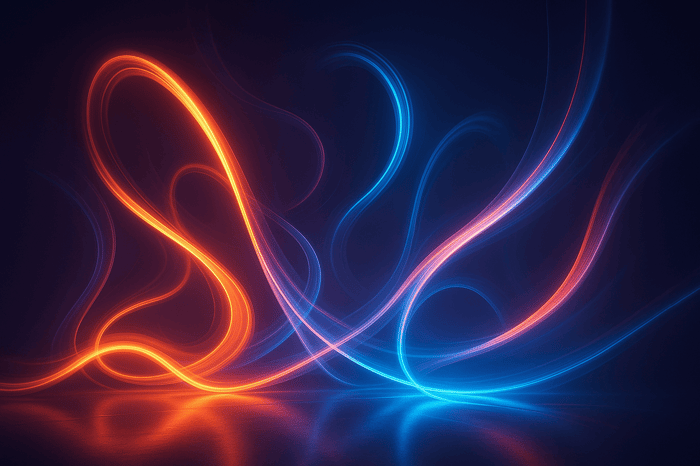
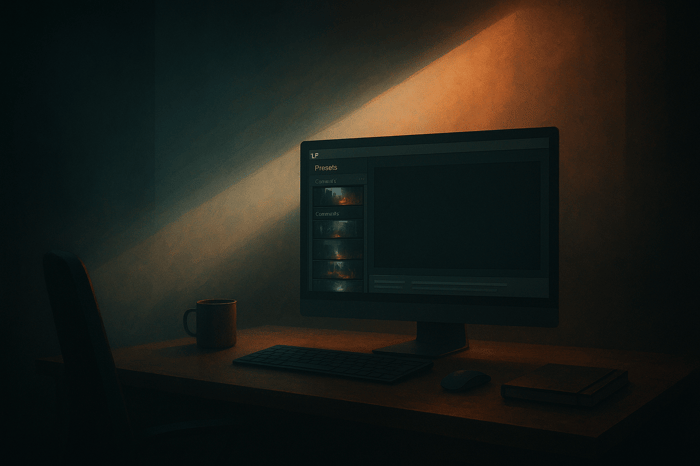
Cinematic presets are pre-made editing tools in Lightroom that allow you to transform your photos with a single click. Unlike basic filters that simply add a color overlay, these presets mimic the look and feel of film by adjusting multiple settings at once. This includes changes to white balance, shadows, highlights, color grading, grain, and tone curves - working together to create a polished, cinematic vibe.
For those curious about experimenting with cinematic styles, Presets.io offers a variety of collections aimed at achieving professional-quality results. Whether your preference leans toward cool, moody tones or warm, golden hues, there’s something for every creative vision.
How Cinematic Presets Work
At their core, cinematic presets rely heavily on color grading. They subtly shift hues to establish a specific look, often adding teal to shadows and orange to highlights for that classic cinematic feel. Beyond color, they refine contrast, adjust tones, and incorporate grain to soften the digital sharpness of images.
Technically speaking, presets apply coordinated adjustments to visible settings like exposure, saturation, and shadows, which you can see in Lightroom’s adjustment panels. This differs from profiles, which alter how the RAW file is interpreted before any manual edits are made. Essentially, presets save you time by automating a series of edits that would otherwise need to be done manually.
Benefits of Using Cinematic Presets
Cinematic presets are a huge time-saver, especially for photographers managing large volumes of images, like during weddings where you might shoot both indoor ceremonies and outdoor portraits. With a single click, you can apply complex edits across multiple photos, cutting down your workflow significantly.
They also help maintain a consistent style throughout your work, which is crucial for building a recognizable aesthetic. For beginners, presets offer a great starting point - apply one, study the changes, and reverse-engineer the edits to learn how professionals achieve their results. Over time, you can tweak and save these presets, evolving them into a style that feels uniquely yours.
Drawbacks of Cinematic Presets
While presets are powerful, they’re not a one-size-fits-all solution. Lighting conditions can vary dramatically, and presets often require adjustments to look their best. They also can’t fix fundamental issues like poor exposure, so you’ll still need to fine-tune your images.
Another challenge is reduced flexibility. Presets can sometimes affect crucial elements like white balance or skin tones, which is especially tricky in portrait photography where natural colors are key. Over-editing is another risk - dramatic presets may feel repetitive or overly stylized when used across a portfolio. To avoid this, it’s wise to test presets on a variety of images (e.g., light, dark, or high contrast) and dial back edits by about 20% for a more natural result.
Manual Lighting Adjustments Explained
Manual lighting adjustments in Lightroom provide a hands-on alternative to presets, giving you the freedom to fine-tune every detail. This approach involves assessing each image individually and tweaking elements like exposure, contrast, shadows, highlights, and color balance. To achieve natural and polished results, it’s essential to understand the basics of exposure and how these adjustments work together. This method lays the groundwork for mastering Lightroom’s key adjustment tools.
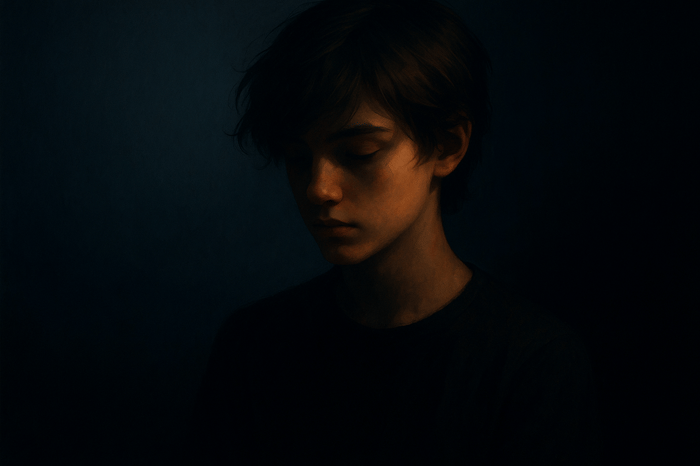
Start with the Basic panel, where you can adjust overall exposure and white balance using the Temp and Tint sliders. Begin by setting the overall brightness with the Exposure slider to create a balanced foundation. From there, refine specific tonal ranges: brighten darker areas with the Shadows slider, or recover details in overexposed highlights using the Highlights control. Adjusting Temp and Tint helps balance warmth and ensures natural-looking skin tones, which is especially crucial for portraits.
For more targeted tonal adjustments, use the Tone Curve. This tool allows you to create a custom curve to emphasize specific tonal ranges. A popular technique is applying a subtle S-curve, which lifts shadows slightly and softens highlights, giving your image a cinematic, film-like quality. The precision of the Tone Curve complements the broader adjustments made in the Basic panel.
The HSL panel (Hue, Saturation, Luminance) offers even more control over colors. For instance, you can shift greens toward yellow for a warm, autumnal look or reduce the saturation of certain colors to create a harmonious palette. This tool is particularly helpful when working with images that have diverse lighting conditions. By combining tonal and color adjustments thoughtfully, you can craft a refined, cinematic aesthetic.
When editing manually, precision and subtlety are key. Pay close attention to skin tones - if they look too orange, green, or overly smooth, it’s a sign that your adjustments may be overdone. Since photos rarely come out perfectly exposed straight from the camera, it’s important to remain flexible and adapt your edits to each image’s unique lighting challenges.
Although manual editing takes time to master, it offers unparalleled creative control. Unlike presets, which apply a one-size-fits-all solution, manual adjustments are tailored to the specific needs of each photograph. Over time, you’ll develop an instinct for which tools to use in different scenarios, building a mental toolkit of effective techniques. Many professional photographers refine their craft this way, relying on personalized methods that go beyond what presets can achieve. With practice, the process becomes second nature as you learn to recognize lighting patterns and understand how your camera captures light.
Key Lightroom Tools for Manual Adjustments
When it comes to manual editing, having the right tools at your fingertips can make all the difference. Lightroom offers a suite of features that give you precise control over light, shadow, and color, allowing you to turn simple adjustments into creative expressions.
Let’s start with the Basic Panel, which houses the fundamental controls for your edits. The Exposure slider adjusts the overall brightness of your image, and it’s crucial to nail this step - no preset can fix a poorly exposed photo. Once the base exposure is set, the Highlights slider lets you recover details in overly bright areas, like skies that might otherwise look washed out. On the other hand, the Shadows slider lifts darker areas, revealing hidden details or creating a lighter, more open feel. These tools set the foundation for your edits and prepare your image for more refined adjustments.
Next, the Whites and Blacks sliders allow you to fine-tune the brightest and darkest parts of your photo. These controls help you manage the full tonal range, ensuring no detail gets lost at either extreme.
For color accuracy, head to the White Balance controls, which include the Temperature and Tint sliders. These tools are critical for correcting color casts and maintaining natural tones. For example, if you’re shooting indoors under tungsten lighting, your photo might have an orange hue. Sliding the Temperature toward cooler tones can neutralize this. Similarly, the Tint slider balances magenta and green tones, helping you achieve a natural and pleasing color palette.
The Tone Curve is where you can take your edits to the next level. It allows for precise tonal adjustments by plotting points along a curve, giving you control over shadows, midtones, and highlights. A slight S-curve, for instance, can add contrast and deliver a cinematic feel. While the Contrast slider offers a quicker way to adjust the difference between light and dark areas, the Tone Curve is your go-to for more nuanced edits, like boosting midtones while keeping highlights and shadows balanced.
For targeted color grading, the HSL panel (Hue, Saturation, Luminance) is indispensable. This tool lets you isolate and adjust specific colors. Want to desaturate just the blues in a sky while keeping other tones vibrant? Or shift greens to a warmer tone? The HSL panel gives you that level of control, far beyond what basic saturation adjustments can achieve.
To add depth and texture, the Clarity slider enhances midtone contrast, giving your image a more three-dimensional look. It’s particularly effective for landscapes or architectural shots. However, use it sparingly - overdoing Clarity can make skin tones look harsh and unnatural.
A helpful tip: After making adjustments, scale them back by about 20% to avoid an over-edited appearance.
Finally, the Grain tool in the Effects panel adds a subtle texture reminiscent of film photography. This is perfect for giving your digital images a more organic, timeless feel. The key here is restraint - just enough grain to add character without overwhelming the photo.
The real magic of Lightroom lies in how these tools work together. Start with the Basic Panel to establish a solid tonal and color foundation. Then, use the Tone Curve for more detailed tonal adjustments and the HSL panel for fine-tuning colors. This workflow keeps your edits efficient and avoids redundancy - there’s no need to use the Tone Curve to brighten shadows if the Shadows slider can do it more easily.
Lastly, practice is everything. Test your adjustments on different images and lighting conditions to refine your skills. Real-world photography rarely delivers perfect lighting, so flexibility and adaptability are key to mastering your edits.
Benefits of Manual Adjustments
Manual editing in Lightroom offers something presets can’t: complete creative control. Instead of applying uniform adjustments, you can fine-tune exposure, contrast, color, and mood to match the specific needs of each shot - whether it’s a commercial project, a wedding gallery, or a fine art piece.
One standout advantage is its ability to handle tricky lighting situations. Real-world lighting isn’t always perfect. From the harsh midday sun to the soft glow of golden hour or the mixed tones of indoor lighting, manual adjustments let you recover blown highlights, lift shadows, and balance the overall exposure - all while maintaining image quality. This flexibility sets the stage for more refined, photo-specific edits.
Another big plus is the precision it offers. With tools like the Temperature, Tint, and HSL sliders, you can make targeted corrections - like perfecting skin tones - that global presets often miss. This level of detail ensures your edits feel polished and natural.
Manual editing also minimizes the risk of over-editing. When you’re in control of every adjustment, you can make subtle, deliberate changes instead of relying on broad preset effects. This approach helps maintain the authenticity of your images.
Beyond technical advantages, manual adjustments let you craft a unique story for each photograph. Instead of relying on preset moods, you can create custom atmospheres that align with the narrative you want to tell. Cooler tones might evoke a sense of melancholy, while warmer hues can add intimacy or nostalgia. These choices allow your images to convey the exact emotion you’re aiming for.
As you continue to refine your manual editing skills, you’ll naturally develop a personal style. This individualized approach ensures consistency across your work while giving you the flexibility to adapt to different shoots. Each adjustment deepens your understanding of light, color, and composition, helping you grow as a photographer. Plus, honing these skills is a practical and cost-effective way to elevate your craft.
Lastly, manual adjustments are timeless. Photography trends come and go, but strong foundational skills give you the ability to adapt and create looks that remain relevant. This ensures your work stays fresh and engaging, no matter how styles evolve.
Drawbacks of Manual Adjustments
Manual editing gives photographers unparalleled creative control, but it comes with some notable downsides that can affect both workflow efficiency and profitability. The biggest challenge? Time. Editing each image individually is a slow process, especially when dealing with large batches - like transitioning from indoor ceremony shots to outdoor portraits. For professional photographers, this time sink directly impacts their bottom line. Every hour spent editing is an hour not spent shooting, marketing, or building relationships with clients. For those charging per project or session, this extra editing time eats into profits and limits the number of clients they can take on.
On top of the time commitment, mastering manual adjustments can be a steep learning curve. Tools like Lightroom require familiarity with several panels, such as the Basic panel (for exposure, white balance, and contrast), the HSL panel (for color tweaks), the Tone Curve panel (for tonal adjustments), and the Effects panel (for adding grain or texture). Learning to use these tools effectively takes practice, and for beginners, achieving polished results can feel like an uphill battle.
Another common pitfall is over-editing. It’s easy to push sliders too far, resulting in images that look unnatural or overly processed. A helpful tip? After making adjustments, scale them back by about 20% to maintain a more subtle, natural look. But developing this restraint takes experience, and trial and error is often the only teacher.
Skin tones are another tricky area. Clients are quick to notice when skin tones look off, making this a frequent pain point for less experienced editors. Adjustments to exposure, white balance, or contrast can easily result in blown-out highlights, crushed shadows, or an unbalanced color palette if not handled carefully. These mistakes often require re-edits, adding even more hours to the process.
Manual adjustments also depend heavily on the quality of the original shot. If an image is severely underexposed or overexposed, editing tools can only do so much to fix it. Perfect exposure isn’t always possible, especially in challenging lighting conditions, which means photographers often have to either discard problematic images or spend extra time trying to salvage them. Either way, it’s a time-consuming process.
Consistency is another major hurdle with manual editing. Without the structure provided by presets, maintaining a cohesive look across a set of images becomes difficult. Each photo is edited based on the photographer’s judgment in the moment, which can vary depending on mood, fatigue, or even changing preferences during the session. This inconsistency can make it hard for photographers to establish a recognizable style or brand identity, which is crucial for standing out in a competitive market. Keeping edits consistent requires significant discipline and careful documentation of every adjustment - a tedious task that adds to the mental strain of manual editing.
Speaking of strain, manual editing can lead to decision fatigue. The constant need to make small adjustments wears on mental focus, especially during long editing sessions. As this fatigue builds, the quality of edits often declines, particularly toward the end of a session.
For beginners, the sheer number of options in manual editing can feel overwhelming. Starting with a blank slate and dozens of adjustment sliders can lead to analysis paralysis. Without a clear plan or framework, it’s hard to know where to start or how to achieve the desired look.
Given these challenges, it’s no surprise that many photographers incorporate cinematic presets into their workflows to save time and ensure consistency. For those sticking with manual adjustments, it’s crucial to focus on the essentials first: exposure, white balance, contrast, and tone curves. Paying close attention to skin tones is especially important, as mistakes here are both noticeable and difficult to overlook.

Luminar Neo Cross-Device Perpetual Desktop Software

$129.50
$159.00
Luminar Neo Cross Device Perpetual Desktop Software Luminar Neo is a visionary AI-powered photo editor that redefines creativity with cutting-edge technology. Effortlessly achieve studio-quality results with next-gen tools designed to empower and inspire. Harness the power of GenAI to erase… continue reading
sbb-itb-b27063b
Workflow Speed Comparison
When it comes to editing speed, the gap between using presets and relying on manual adjustments is striking. Applying a cinematic preset is as simple as a single click, transforming an image in seconds. Achieving the same result manually could take several minutes - or even longer - depending on the complexity of the adjustments. This time difference becomes crucial when you're working with large batches of photos.
The advantage of presets really shines in high-volume projects. For example, wedding photographers or anyone handling hundreds of images can save hours, even days, by using presets to create a unified look across an entire shoot. This eliminates the need to edit each image individually from scratch.
That said, presets aren’t a one-size-fits-all solution. While they streamline the process, they often require additional tweaks for elements like white balance, exposure, and contrast. After applying a preset, photographers still need to fine-tune these settings for each image. Even with this extra step, the time saved compared to fully manual editing is substantial.
The real efficiency of presets lies in how they allow photographers to skip foundational adjustments. Instead of starting with the basics - like setting the color palette, adjusting shadows and highlights, or creating tone curves - photographers can jump straight to refining the unique aspects of each photo. Manual editing, on the other hand, requires building these adjustments from the ground up for every single image.
For photographers focused on building a portfolio or maintaining a consistent brand style, presets offer another major advantage: they ensure a uniform look while cutting out repetitive tasks. This consistency is especially useful when working on bulk edits.
However, the effectiveness of presets can depend on the shooting conditions. If the lighting is consistent throughout a shoot, presets often require minimal tweaking. But in cases where lighting varies, more manual adjustments will be needed after applying the preset. In these scenarios, presets still provide a strong starting point, but photographers must adjust for exposure and white balance variations to ensure the final images look polished.
Presets streamline the editing process by acting as a quick foundation for adjustments. They excel at creating consistency across similar images, leaving manual adjustments to address the unique details of individual photos. Many photographers find that combining the two - presets for the groundwork and manual edits for fine-tuning - offers the most efficient workflow.
Of course, no editing method can compensate for poor exposure. Whether you're using presets or manual adjustments, starting with well-exposed images is essential. Proper exposure in-camera ensures that both approaches can deliver the best results without the struggle of trying to fix major issues.
Time Required: Presets vs Manual Editing
Let’s dive into how presets stack up against manual editing in terms of time. Applying a preset is almost instantaneous - just one click. In contrast, manual editing involves tweaking multiple settings like exposure, highlights, shadows, contrast, and tone curves, which can take anywhere from 5 to 15 minutes per image, depending on the complexity of the photo and your skill level.
For a single photo, the time difference is striking. Presets take a click and an additional 2 to 5 minutes for fine-tuning under consistent lighting. For simpler cases, such as evenly lit portraits, presets can speed up the process by 5 to 10 times compared to manual editing. However, for more intricate images or those with varying lighting, the time advantage narrows to a 20% to 30% reduction. In controlled environments like studio shoots, presets allow you to finish a photo in 1 to 3 minutes, slashing editing time by 70% to 80%. On the other hand, for events like weddings, where lighting conditions shift between indoor ceremonies and outdoor receptions, editing time per image increases to 3 to 7 minutes, with time savings dropping to 40% to 60%.
Creating your own custom preset does require an initial time investment - about 15 to 30 minutes to design a look that works across various photos. But the payoff is huge. Once your preset is ready, you can apply it to hundreds of images, each needing just 1 to 3 minutes for minor tweaks. The time saved starts to outweigh the setup effort after editing just 10 to 15 images. Many photographers also spend an extra 5 to 10 minutes fine-tuning purchased presets to align with their camera settings and style.
While presets don’t eliminate the need for adjustments, they give you a solid starting point. Instead of tweaking every slider from scratch, you can focus on refining the unique elements of each image. This streamlined workflow becomes especially valuable when handling large photo batches, saving time without sacrificing quality.
Batch Editing with Presets
Presets are all about speed, but when you pair them with batch editing, your workflow becomes even more efficient. Batch editing lets you apply a single preset to multiple images at once, saving you a ton of time. For example, in Lightroom's Library module, you can select a group of photos (click the first, hold Shift, and click the last) and apply your chosen cinematic preset. Instantly, every image in the batch gets the same color grading, contrast tweaks, and tonal adjustments. High-quality cinematic presets - like those from Presets.io - are especially useful for keeping things consistent and effortless, particularly when your shooting conditions don't change much.
This method is a go-to for studio shoots, event photography, and product photography - basically, any scenario where lighting stays steady. Wedding photographers, for instance, can save hours with batch editing. Instead of manually editing 500 photos one by one, they can group images by lighting and location (ceremony, reception, outdoor portraits, etc.) and apply a preset to each group. What could take days can be reduced to hours.
That said, batch editing isn’t always a perfect one-click fix. If your photos have varying lighting conditions - say, mixing indoor and outdoor shots or images taken at different times of day - a single preset might not work evenly across all of them. In these cases, it’s better to organize your images into smaller groups based on similar lighting before applying presets. Spending a little extra time organizing upfront ensures more consistent results.
Once you’ve applied a preset to a batch, you might still need to fine-tune some individual images. Lightroom's Sync Settings can help with this. For example, if you adjust the white balance or highlights on one photo, you can sync those changes across similar images in the batch. This way, you maintain the speed of batch editing while addressing subtle differences in exposure or lighting.
Even with these minor adjustments, the time savings are huge. Batch editing can cut your editing time by up to 70% without compromising on quality.
To make sure your preset works well, test it on 10–15 images that represent the range of lighting conditions in your batch. If you find you’re making heavy adjustments to more than half of the test images, the preset might not be the right fit. You can either tweak the preset for better results or switch to manual editing for that batch.
Photographers who often work under consistent conditions often create their own custom presets for batch editing. Labeling presets clearly - like "Wedding_Indoor_Tungsten" - makes it easier to know when and where to use them. Keeping notes on which presets work best for specific venues or setups helps refine your workflow over time.
The key to successful batch editing is consistency. When exposure, white balance, and lighting are uniform, presets can deliver seamless results across hundreds of photos. If conditions vary, batch editing still saves time, but you’ll need to invest a little more effort in fine-tuning. By balancing batch editing with manual adjustments, you can achieve both speed and quality in your cinematic workflow.
Using Presets and Manual Adjustments Together
When it comes to editing, blending presets with manual adjustments can give you the best of both worlds: speed and precision. Think of presets as your foundation - they set the tone and mood of your image - but the real magic happens when you make manual tweaks to suit the unique lighting and composition of each photo. This approach is a favorite among professional photographers because it combines efficiency with the ability to fine-tune for perfection.
Here’s the idea: use presets to quickly establish a base look, saving you from starting from scratch every time. From there, dive into manual adjustments to refine the details. This way, presets handle the heavy lifting of color grading, while your personal touch ensures every image feels polished and natural.
Before applying a preset, make sure your photo is properly exposed. This step ensures the preset works as intended and gives you a solid starting point. High-quality presets, like those from Presets.io, are designed to adapt to a variety of shooting conditions, making them an excellent choice for this workflow. Once your preset is applied, fine-tune key elements like white balance, exposure, and contrast to achieve a balanced and film-like aesthetic.
Dive deeper with tools like the Tone Curve to create a subtle S-curve for that cinematic vibe, the HSL panel for precise color adjustments, and the Effects panel to add a touch of grain for a film-inspired texture. Keep your edits subtle - overdoing it can leave your images looking artificial. Pay extra attention to skin tones, as they’re a clear marker of professional-quality work.
One of the great advantages of this method is flexibility. You can tweak a preset to better match your style and save it as a custom version. Over time, many photographers turn even purchased presets into something that feels uniquely their own, building a library tailored to their specific camera settings, lighting conditions, and creative vision.
This combined approach is especially useful for batch editing, where you can sync adjustments across multiple photos with similar conditions. It’s a lifesaver for wedding, portrait, and commercial photographers who need consistent, high-quality results without spending hours on each image. By merging the speed of presets with the precision of manual editing, you streamline your workflow without compromising on quality.
When to Use Each Method
Deciding between cinematic presets and manual lighting adjustments isn’t about picking one over the other. It’s about understanding which method aligns with the needs of your specific project. Factors like available editing time and the desired final result play a big role in making the right choice.
What to Consider When Choosing
Time constraints often dictate your approach. If you’re working under a tight deadline and need to process a large batch of photos quickly, presets are a lifesaver. On the other hand, when you have more time and the project demands intricate details, manual adjustments deliver the precision you need.
Consistency is another key factor. For projects requiring a uniform look - like wedding albums or social media feeds - presets are unmatched. They ensure a cohesive visual style with minimal effort, making them ideal for maintaining a polished, consistent aesthetic.
Your creative vision should also guide your decision. Presets are perfect for achieving specific cinematic effects, with options ranging from vintage tones to modern, dramatic styles. For example, collections from Presets.io are designed to help you achieve these looks effortlessly. However, if your project involves a highly specific or experimental vision, manual adjustments give you the freedom to fine-tune every detail.
Experience level plays a big role too. Presets are beginner-friendly, letting even those new to editing produce professional-quality results. In contrast, manual adjustments require a deeper understanding of editing tools like exposure, white balance, and tone curves. While presets are great for starting out, seasoned editors often prefer the control that manual editing provides.
Lastly, consider image quality and shooting conditions. Presets work best with well-exposed photos, but they can fall short in tricky lighting situations - like harsh shadows or mixed color temperatures. In these cases, manual adjustments allow you to correct and enhance your images with greater precision.
Best Use Cases for Each Method
Social media content creation is where presets truly excel. Platforms like Instagram and TikTok demand speed and consistency. With presets, you can maintain a cohesive visual style across your posts without spending hours editing, leaving you more time to focus on creating engaging content.
Event photography, such as weddings or corporate events, benefits greatly from presets. When you’re delivering hundreds of photos taken under similar lighting conditions, presets streamline the process. They allow for quick batch edits, while still leaving room for minor manual tweaks when necessary.
Personal projects and lifestyle photography also thrive with presets. Whether you’re documenting a trip, creating blog content, or building a portfolio, presets provide a polished look with minimal effort.
Commercial and advertising work, however, often requires manual adjustments. Clients paying top dollar expect images tailored to their brand’s vision. These projects usually involve complex lighting setups and precise color matching that presets alone can’t achieve.
Fine art photography demands the creative flexibility that manual editing offers. When producing work for gallery exhibitions or limited prints, every detail matters. Manual adjustments let you craft the exact mood and tone you envision.
Portrait sessions with varied lighting present unique challenges. For sessions shot in consistent lighting, presets can save time. But when lighting conditions shift - like moving from outdoor to indoor settings - manual editing becomes essential for maintaining natural skin tones, a detail clients notice immediately.
Product photography for e-commerce requires absolute color accuracy. While presets can serve as a starting point, manual adjustments ensure products look exactly as they should, which is especially important in industries like fashion or cosmetics, where accurate colors influence buying decisions.
Here’s a quick comparison of how presets and manual adjustments stack up:
| Factor | Presets | Manual Adjustments |
|---|---|---|
| Speed | Quick and efficient | Time-intensive |
| Best For | Social media, bulk edits, events | Complex projects, fine art, commercial work |
| Learning Curve | Beginner-friendly | Requires expertise |
| Flexibility | Limited to preset parameters | Full creative control |
| Consistency | Great for uniform lighting | Excellent for varied conditions |
| Cost Efficiency | Saves time, higher initial investment | More time-intensive, lower upfront cost |
| Customization | Requires tweaking | Fully customizable |
Conclusion
Deciding between cinematic presets and manual adjustments isn’t about choosing one over the other - it’s about knowing when to use each to get the best results.
Cinematic presets offer speed and consistency, making them ideal for tasks like batch editing, creating social media content, or maintaining a cohesive look across a project. Tools like those from Presets.io can help you achieve professional-quality color grading in seconds, saving you hours of effort. For instance, Presets.io provides a wide range of cinematic presets that deliver polished, unified results with minimal effort.
On the other hand, manual adjustments give you precision and full creative control. They shine when working on intricate projects like commercial photography, fine art, or images with tricky lighting. Manual editing is essential when accuracy is key, such as achieving natural skin tones or tackling unique lighting challenges.
The real magic happens when you combine both methods. Start with a cinematic preset to establish a solid foundation, then fine-tune manually to meet specific needs. For example, applying a preset and then adjusting white balance, exposure, or reducing the intensity by around 20% can prevent an over-edited look while maintaining a professional finish. This hybrid approach saves time while giving you the flexibility to perfect every detail.
Ultimately, experimenting with both techniques will help you develop your own editing style. Try different presets under various lighting conditions, identify the manual tweaks that elevate your work, and create a workflow that aligns with your vision and project requirements. It’s not about choosing sides - it’s about using the right tool at the right time to craft images that truly stand out.
FAQs
When should I use cinematic presets instead of manually adjusting lighting in Lightroom?
When deciding between cinematic presets and manual lighting adjustments, it really comes down to your workflow and creative vision. Presets are a fantastic option if you're aiming for a polished, professional look in a short amount of time. They're especially helpful when you're working with a consistent style or editing a batch of photos, saving you time while still producing eye-catching results.
On the flip side, manual adjustments give you complete control over every detail, making it easier to fine-tune elements like shadows, highlights, or color tones to align perfectly with your artistic vision. For many photographers, a hybrid approach works best - starting with a preset to establish a base and then tweaking manually to achieve the perfect final look.
What mistakes should I avoid when using cinematic presets, and how can I make sure they enhance my photos effectively?
When working with cinematic presets, one frequent misstep is using them without accounting for your photo's original lighting and tone. Presets are meant to complement and enhance your image, not overhaul it entirely. So, it's important to ensure the preset matches the mood and composition of your shot.
To get the best results, begin by fine-tuning the basics - adjust your image's exposure, contrast, and white balance before applying the preset. Once the preset is in place, tweak settings like shadows, highlights, or saturation to align with your vision. Keep in mind, presets are just a starting point. Even minor adjustments can elevate your photo to a polished, professional standard.
How can I use presets and manual adjustments together to create a personalized editing style?
Combining presets with manual tweaks is a great way to craft an editing style that truly reflects your vision. Start by using a cinematic preset to set the tone, color, and overall mood of your photo. Presets are especially handy for saving time and maintaining a consistent look across multiple images.
After applying the preset, dive into the details and make manual adjustments to match your specific goals. Fine-tune elements like exposure, shadows, highlights, and color grading to bring out the best in your photo. This method strikes a perfect balance between the speed of presets and the creative control of manual editing, giving you a final image that feels polished and personal.