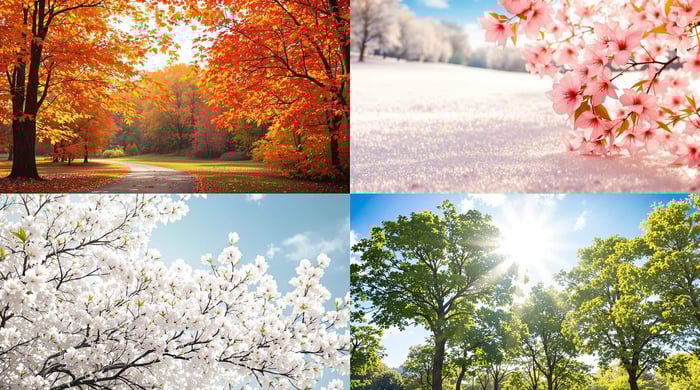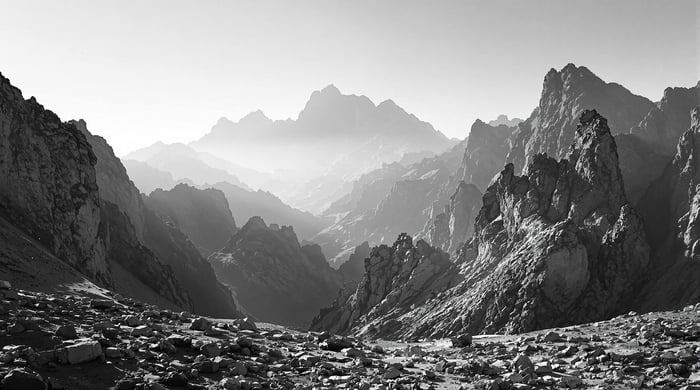

Black and White Photography Presets: Achieve Timeless, Classic Edits
Black and white photography presets are a quick and easy way to transform your photos into timeless, high-quality monochrome images. These presets save time, ensure consistency, and help you learn editing techniques while achieving a polished, professional look. Here’s what they do:
- Enhance Texture and Contrast: Bring out details and depth in your photos.
- Adjust Tonal Range: Balance highlights, shadows, and midtones for a striking effect.
- Set the Mood: Create emotional impact with tonal adjustments.
Key Benefits:
- Save Time: Apply detailed edits instantly.
- Consistency: Maintain a cohesive style across your photos.
- Learn Editing: Understand exposure, contrast, and tonality through preset adjustments.
Popular Preset Styles:
- Cinema Double X: High contrast, dramatic feel for portraits or architecture.
- Tri-X 400: Grainy texture, nostalgic vibe for street scenes.
- Ilford HP5: Versatile contrast, balanced grain for general photography.
To get started, choose presets that match your creative goals, install them in Lightroom, and fine-tune their effects for the best results. Whether you're editing portraits, landscapes, or architecture, black and white presets simplify the process while delivering timeless results.
Black & White Presets Basics
What Black & White Presets Do
Black and white presets transform color photos into monochrome images by adjusting settings like exposure, contrast, highlights, shadows, and tonal balance. These adjustments remove color distractions while refining the overall look of your photos [1].
Main Preset Advantages
Using black and white presets comes with several perks:
- Save Time: Skip hours of manual editing by applying detailed adjustments instantly.
- Consistency: Ensure a cohesive style across your entire photo set.
- Learn Editing Techniques: Analyzing preset adjustments can teach you how to handle exposure, contrast, and tonal balance effectively.
- Professional Finish: Achieve polished, high-quality results with expertly crafted settings.
Popular Preset Styles
Choosing the right preset style is essential to match your creative goals. Here are some popular options:
| Preset Style | Characteristics | Best Used For |
|---|---|---|
| Cinema Double X | High contrast with a dramatic, moody feel | Street photography, architecture, portraits |
| Tri-X 400 | Grainy texture with a nostalgic look | Documentary shots, street scenes |
| Acros 100 | Fine grain and smooth tonal transitions | Portraits, landscapes |
| Ilford Pan F | Deep blacks, moody tones, minimal grain | Weddings, fine art photography |
| Ilford HP5 | Balanced grain with versatile contrast | General photography |
Each preset offers a distinct aesthetic, perfect for creating specific moods or enhancing the timeless appeal of black and white photography. The trick is to pick presets that align with your creative vision and the story you want your photos to tell.
How to Create the ILFORD HP5 Look in Lightroom Classic Tutorial Preset
Selecting Black & White Presets
Let's dive into how to pick black and white presets that align with your photography style and workflow.
What to Look For
When selecting black and white presets, keep these points in mind:
- Subject Suitability: Think about whether your subject works well in monochrome. Landscapes, architecture, and portraits often shine, while subjects relying on color might need extra adjustments.
- Technical Factors: Consider your shooting conditions, such as lighting contrast, directional light, textures, and overall composition.
- Artistic Goals: Decide on the mood you're aiming for - whether it's a timeless feel, bold contrast, emotional resonance, or a minimalistic approach.
Once you have these factors sorted, explore curated collections that align with your creative goals.
Recommended Preset Collections
Here are some trusted collections that cater to different styles and needs:
| Collection Name | Style Features | Best For |
|---|---|---|
| Greater Than Gatsby Hitchcock | Film-inspired with 20 variations | Versatile photography styles |
| VSCO Film X | Modern contrast and clean tones | Contemporary portraiture |
| RNI All Films 5 | Recreation of classic film looks | Fine art photography |
| DxO FilmPack 6 | Emulates historical processes | Traditional photography |
After identifying collections that catch your eye, evaluate their quality to ensure they meet your needs.
How to Evaluate Presets
When testing presets, focus on these aspects:
- Base Image Compatibility: Start with well-exposed images. High-quality presets should retain highlights and shadows, preserve textures, and adapt to different lighting conditions.
- Workflow Fit: Check if the presets integrate seamlessly with your editing tools. They should allow for fine-tuning, quick processing, and smooth stacking with other adjustments.
- Performance Across Images: Apply presets to various photos to see how they handle different lighting and subjects. Pay special attention to tone, grain, and texture to ensure consistency.

Using Presets in Lightroom
After choosing a preset, use these Lightroom techniques to refine your monochrome edits.
Preset Setup Guide
Here’s how to set up your presets:
Installing Presets
Open Lightroom and go to the File menu. Select "Import Profiles & Presets", then locate and choose your .zip file. Lightroom will automatically import the presets. (Tip: If you're on a Mac and Safari automatically unzips files, disable the "Open 'safe' files after downloading" option in Safari preferences to avoid issues.)Organizing Your Workspace
Create a folder structure to keep your presets organized. This is especially helpful if you’re managing multiple collections, like Pretty Presets' Film Noir or Dark and Moody Millennium collections.
Once your presets are installed and sorted, you're ready to tweak their effects.
Fine-Tuning Preset Effects
Follow this workflow for optimal results:
- Apply the preset.
- Adjust the Amount slider to control the preset's intensity (range: 0-200%) [3].
- Use Lightroom's editing tools to fine-tune settings like:
- Tone and contrast
- Clarity
- Black & White treatment
- Lens corrections [4]
- Make local adjustments with brushes or gradients if necessary.
Note: The Amount slider doesn’t affect Black & White treatment or lens corrections. You’ll need to adjust these separately in the Edit panel [4].
Making Presets Work for You
Once you've mastered basic Lightroom edits, you can take things further by using advanced techniques to get the most out of your presets.
Contrast and Tone Control
Fine-tuning contrast and tone can transform your photos, especially for monochrome images. Start with Lightroom's Whites and Blacks sliders to set the brightest and darkest points in your photo. This helps add depth and definition while keeping important details intact [5].
Here’s how you can refine tonal control:
- Adjust the exposure to balance highlights and shadows.
- Tweak the contrast for smoother transitions between tones.
- Use the curves tool for more precise control over the tonal range.
- Add selective adjustments to bring attention to specific areas of the photo.
Film-Style Effects
VSCO presets are a great starting point for creating a film-inspired look. For example, the B1 PRO preset offers a subtle black-and-white finish with strong shadow detail and contrast. If you’re after a bolder style, the B5 PRO preset emphasizes textures and adds dramatic depth.
To create a film aesthetic:
- Pick a preset that fits your vision - B1 PRO for a flexible, understated look or B5 PRO for more drama.
- Adjust the grain settings, including the amount, size, and roughness, to mimic the texture of film.
Building Custom Presets
If you’ve made adjustments you love, save them as custom presets. VSCO's Pro Presets give you the flexibility to tweak color, contrast, and tone, making it easy to create a signature style.
Keep these tips in mind when building custom presets:
- Start with high-quality images to ensure the best results.
- Focus on smooth tonal transitions for a polished look.
- Use selective adjustments to fine-tune specific areas.
- Save multiple variations to suit different lighting or conditions.
Pro-Level Preset Techniques
To elevate your black and white presets, focus on two advanced methods: targeted adjustments and preset stacking. These techniques give you greater precision and control over your edits.
Targeted Adjustments
Lightroom’s Targeted Adjustment Tool (TAT) is a powerful way to fine-tune specific areas of your image during black and white conversions [7]. It allows you to adjust tonal values directly, making it easier to refine tonal relationships.
- Click the target icon in the B&W panel.
- Drag upward to brighten or downward to darken specific areas.
For instance, editing a vintage train photo? Use an inverted Select Sky mask to isolate the train body. Then, increase Clarity to +97 to bring out the texture of the rusted metal while leaving the sky untouched [6].
"The real secret to black and white in Lightroom is mixing the tone vs the channels of color with details in various ways. This can be done manually but in reality, you won't try enough. It would take too long." – Gavin Seim
Once you've nailed down tonal tweaks, you can take things further by layering effects with preset stacking.
Preset Stacking
Preset stacking is all about combining multiple presets to craft a customized black and white look [9]. The key is to layer presets that adjust different settings, rather than piling on changes to the same parameters [8].
Here’s a suggested workflow for stacking:
| Order | Preset Type | Purpose |
|---|---|---|
| 1 | Base Adjustment | Correct white balance and exposure |
| 2 | Tonal Foundation | Apply the main black and white look |
| 3 | Effect Layer | Add grain or texture |
| 4 | Local Adjustment | Refine specific areas |
| 5 | Final Polish | Sharpen or reduce noise |
Be mindful of the intensity of each preset. Start with subtle changes and build up gradually. Overusing sliders in Lightroom Classic’s B&W panel can lead to pixelation or loss of detail [6]. For inspiration, check earlier sections for presets that work well together.
Conclusion
Black and white presets simplify monochrome editing in Lightroom, making it faster while giving you more control. They encourage a mindset focused on black and white photography, helping you approach your edits with intention[11].
These presets are especially useful in tricky situations. For instance, they can help with mixed lighting by reducing unwanted color casts and improving texture and contrast. They can even turn artifacts and noise into pleasing grain effects, adding character to your photos.
Looking to dive deeper? Check out tools like the Presets.io collections (starting at $12.00, with the Master Bundle priced at $49.00[2]) or Photography Concentrate's "Before/After: Black & White" tutorial, available for $67.00[10].
Here are a few tips to get the most out of your presets:
- Create different versions of presets tailored to various shooting conditions.
- Use Lightroom's virtual copies to save both color and black-and-white edits of the same photo.
- Adjust preset effects further with Lightroom's advanced tools for a polished result.
Since these presets work on both Lightroom's desktop and mobile apps[1], you can achieve timeless, professional-quality images wherever you are.