Want to create ethereal, dreamy photos with just a click? Here are 7 must-have aesthetic presets to transform your images:
Soft Pastel Dreams: Muted colors and soft tones
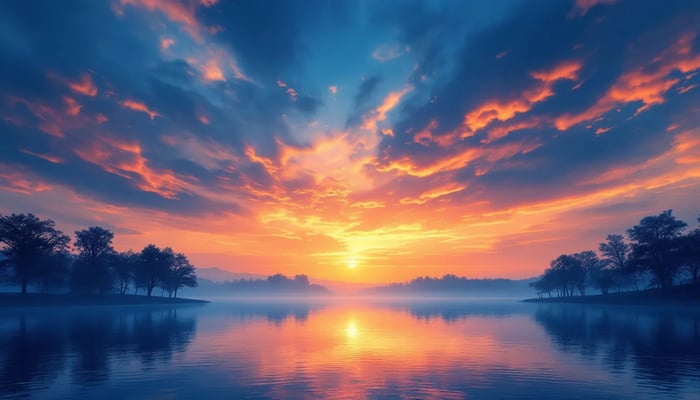
Golden Hour Glow: Warm sunset-like effects
Ethereal White Balance: Bright, airy aesthetics
Dreamy Bokeh Background: Blurred backgrounds
Light Highlights and Shadows: Subtle exposure balancing
These aesthetic presets work best as starting points - tweak them to fit your style and photo needs. For quick dreamy edits:
Lower Clarity
Increase Contrast slightly
Reduce Vibrance
Remember: Subtle adjustments often look best. Experiment to find your signature dreamy look.
Dreamy Preset Tutorial
Quick Comparison
| Preset | Best For | Main Effect | Ease of Use |
|---|---|---|---|
| Soft Pastel Dreams | All photos | Muted colors | Easy |
| Golden Hour Glow | Outdoor shots | Warm tones | Moderate |
| Ethereal White Balance | Indoor/Outdoor | Balanced whites | Easy |
| Creamy Skin Tones | Portraits | Smooth skin | Moderate |
| Dreamy Bokeh Background | Portraits | Blurred background | Advanced |
| Vintage Film Look | All photos | Retro feel | Easy |
| Light Highlights/Shadows | All photos | Balanced exposure | Moderate |
What are Aesthetic Presets?
Aesthetic presets are like magic wands for photo editing. They're pre-made settings in software like Adobe Lightroom that transform your images with one click.
Think of them as digital recipes for your photos. They adjust things like:
White balance
Exposure
Contrast
Color grading
Tonal curves
Why do photographers love them? Simple:
1. They're fast
Most users save over 90 seconds per image. That adds up when you're editing hundreds of photos!
2. They keep things consistent
Want all your photos to have the same vibe? Presets make it easy.
3. They're efficient
You can apply presets to a whole batch of photos at once. No more editing each image one by one.
But here's the kicker: presets aren't just for pros. They're great for beginners too. As one photographer puts it:
"Make your own. Seriously."
You can buy aesthetic presets, sure. But creating your own? That's where you can start to dial things in even more.
Using aesthetic presets is easy:
Apply the preset
Tweak as needed
Save your changes
Remember: presets are just starting points. You'll often need to adjust them for each photo.
Want that dreamy, soft look? Try this:
Lower the Clarity (softens midtones)
Bump up the Contrast (adds depth)
Reduce Vibrance (tones down colors)
Experiment and have fun. That's what presets are all about!
How We Chose These Aesthetic Presets
We didn't just pick presets that look good. We used a careful process to find ones that work for different photos and styles. Here's what we did:
1. Style Matching
We checked out what's hot on Instagram and Pinterest. This helped us find presets that match current trends.
2. Color Compatibility
We chose aesthetic presets that work well with:
Light, airy photos (think weddings)
Warm, golden tones (great for outdoor shots)
Cool, moody vibes (perfect for cloudy days)
3. Versatility
The best aesthetic presets can handle different lighting. We picked ones that work well in:
Bright sun
Soft, natural light
Indoor settings
4. Skin Tone Enhancement
For portraits and weddings, natural skin tones are key. We chose presets that enhance, not distort, skin colors.
5. Before and After Testing
We tried each preset on lots of photos. This showed us how they perform in real life.
6. User Feedback
We listened to what other photographers say. Real-world use tells us a lot.
7. Customization Options
Our chosen presets let you fine-tune. You can adjust them to fit your style or photo needs.
Here's a quick look at our top picks:
| Preset Type | Best For | Lighting Conditions | Color Enhancement |
|---|---|---|---|
| Light & Airy | Weddings, Portraits | Bright, Natural Light | Soft, Pastel Tones |
| Golden Hour | Outdoor, Landscapes | Warm, Evening Light | Rich, Warm Colors |
| Moody | Overcast Days, Indoor | Low Light, Artificial | Deep, Contrasting Hues |
Soft Pastel Dreams Preset
The Soft Pastel Dreams preset gives your photos a dreamy, light, and airy look. It's great for portraits, weddings, and outdoor shots.
Here's how it works:
Softens the image
Adds pastel tones
Enhances light and shadows
The preset tweaks these settings:
| Setting | Change |
|---|---|
| Clarity | Down |
| Contrast | Slightly up |
| Vibrance | Down |
| Dehaze | -10 |
This combo softens the image but keeps depth.
It's versatile:
Portraits: Adds romance
Weddings: Creates dreaminess
Outdoor shots: Softens harsh shadows
Want to tweak it? Try these:
1. Tone curve: Pull up blacks to soften more.
2. HSL panel: Adjust specific colors. Boost pinks for romance.
3. Iris Blur: Add a slight blur for extra dreaminess.
2. Golden Hour Glow Collection
The Golden Hour Glow Collection brings sunset and sunrise magic to your photos. It's packed with 20 color presets, 18 sun effect presets, and a toolkit for light adjustments and retouching.
Creating the Dream
This collection works its magic by warming up your images, boosting colors, and tweaking highlights and shadows. It uses radial gradients to place light just right, mimicking that soft, warm golden hour glow.
Versatile Across Photo Types
The collection shines on:
Portraits: Giving skin a warm, flattering glow
Landscapes: Bringing out nature's golden hues
Architecture: Softening harsh lines with warm light
Tweaking the Aesthetic Presets
Want to fine-tune your golden hour effect? Here's how:
1. Bump up the temperature for extra warmth
2. Play with color grading: warm up highlights, cool down shadows
3. Use masking to control where the "light" falls
4. Boost oranges and yellows in the HSL panel
"The light is so even and golden, it's tough to mess up exposure - even on faces." - Jenn Byrne, Photographer
3. Ethereal White Balance Preset
The Ethereal White Balance Preset is a must-have for photographers who want dreamy, airy images. It tweaks white balance to create a clean, bright look that's perfect for ethereal shots.
How It Works Its Magic
This preset:
Adjusts color temperature for a soft, warm glow
Fine-tunes tint to zap unwanted color casts
Boosts brightness and clarity
The result? Photos that look like they're bathed in heavenly light.
Versatile Across Photo Types
This preset isn't a one-trick pony. It shines in:
Portraits: Gives skin a flattering glow
Landscapes: Enhances natural light for dreamy vibes
Product shots: Creates a clean, pro look
Tweaking for Better Results
While it's great out of the box, you can fine-tune it:
1. Play with temperature and tint
Use Lightroom's Basic panel sliders. Higher temps add golden hues, lower ones go blue.
2. Adjust exposure and contrast
Bump up exposure for airier feels. Then tweak contrast to keep depth.
3. Use a gray card
For spot-on balance, shoot with a gray card. In post, use the White Balance Selector tool on it.
"RAW lets you adjust white balance effectively in post." - Waltz
sbb-itb-b2706
4. Creamy Skin Tones Enhancer
This preset is a must-have for portrait photographers who want smooth, glowing skin in their edits.
How It Works
The Creamy Skin Tones Enhancer:
Tweaks white balance for natural, warm skin
Softens texture without losing detail
Boosts luminance for a subtle glow
The result? Soft, radiant skin that doesn't look over-edited.
Beyond Portraits
This preset isn't just for headshots:
Weddings: Gives brides an ethereal look
Fashion: Creates high-end magazine vibes
Lifestyle: Adds a dreamy touch to everyday shots
Tweaking the Preset
For best results:
1. Fine-tune white balance
Play with the Temperature slider to nail the perfect skin warmth.
2. Adjust exposure
Bump up exposure slightly to brighten skin without washing it out.
3. Use the Adjustment Brush
Smooth out specific areas without affecting the whole image.
| Adjustment | Effect |
|---|---|
| Increase Temperature | Warms up skin |
| Decrease Clarity | Softens skin |
| Boost Luminance | Adds skin glow |
"Open shade is your best friend for creamy skin tones. It's way more forgiving than other light", says a pro portrait photographer.
5. Dreamy Bokeh Background Blur
This aesthetic preset adds a soft blur to your photos, making subjects stand out against a blurred background.
How It Works
The Dreamy Bokeh Background Blur preset:
Mimics a wide aperture effect
Enhances out-of-focus lights for circular bokeh
Softens the image for an ethereal look
Versatile Applications
It's great for:
Portraits: Focuses on the subject
Weddings: Adds romance
Landscapes: Creates depth
Customizing the Preset
Fine-tune your dreamy bokeh:
1. Blur intensity
Start subtle, increase as needed.
2. Light source enhancement
Adjust brightness and size of bokeh circles.
3. Color temperature
Warm up or cool down to set the mood.
| Adjustment | Effect | Tip |
|---|---|---|
| More blur | Softer background | Use on busy backgrounds |
| Enhance lights | Pronounced bokeh circles | Best with small background lights |
| Warm temperature | Cozy feel | Great for golden hour shots |
"Bokeh can transport subjects, craft interesting light, and add intrigue with a single click", says a creator of a popular Lightroom bokeh preset package.
For best results, shoot with:
A fast lens (f/2 or lower)
Longer focal length (e.g., 135mm)
Subject close to camera, far from background
6. Vintage Film Look Pack
Want to give your digital photos that old-school film vibe? The Vintage Film Look Pack has you covered.
This collection of 30 presets transforms your images with a dreamy, nostalgic feel. Here's how it works:
Softens contrast
Adds warm color tones
Sprinkles in film grain
Applies a subtle vignette
The result? Photos that look like they came straight out of a vintage camera.
Versatile Across Photo Types
| Photo Type | What You Get |
|---|---|
| Portraits | Soft, flattering skin |
| Landscapes | Muted colors, dreamy vibes |
| Street | Gritty, real-world feel |
| Weddings | Timeless romance |
Tweak It Your Way
Like the look but want to make it your own? No problem. You can easily adjust:
Grain intensity
Color temperature
Fade level
Vignette strength
"For that soft, dreamy look, shoot with a wide aperture between 1.4-2.8", says a pro who loves film-inspired presets.
Pro tip: Shoot in RAW and play around with golden hour lighting for that classic film glow.
7. Light Highlights and Shadows Preset
This aesthetic preset is a game-changer for dreamy photo edits. It balances bright and dark areas in your images.
How It Works
The preset:
Softens harsh highlights
Lifts dark shadows
Adds a gentle glow to midtones
The result? Photos with a soft, ethereal quality.
Photo Types It Works With
| Photo Type | Effect |
|---|---|
| Portraits | Smooth skin tones, reduced under-eye shadows |
| Landscapes | Balanced skies and foregrounds |
| Indoor shots | Evened out lighting, reduced harsh contrasts |
| Night photos | Lifted shadows without losing mood |
Adjusting the Preset
You can fine-tune the preset:
Tweak highlight recovery for bright area details
Adjust shadow lifting for dark spot details
Play with clarity for overall softness
Use local adjustments for specific areas
"Understanding your image's range before editing is key to a balanced result", says a Lightroom expert from Pretty Presets.
Pro tip: Shoot in RAW for more flexibility with highlights and shadows.
For an extra dreamy look:
Reduce Clarity slightly
Boost Contrast a bit
Lower Vibrance to tone down colors
Aesthetic Preset Comparison
Let's break down the main features of each preset to help you pick the right one for your dreamy edits:
| Preset | Ease | Photo Types | Effects |
|---|---|---|---|
| Soft Pastel Dreams | Easy | Portraits, Landscapes | Muted colors, Soft tones |
| Golden Hour Glow | Moderate | Outdoor, Sunset | Warm tones, Enhanced shadows |
| Ethereal White Balance | Easy | Indoor, Outdoor | Balanced whites, Soft highlights |
| Creamy Skin Tones | Moderate | Portraits | Smooth skin, Natural look |
| Dreamy Bokeh Background | Advanced | Portraits, Close-ups | Blurred background, Focus on subject |
| Vintage Film Look | Easy | All types | Grain effect, Muted colors |
| Light Highlights and Shadows | Moderate | All types | Balanced exposure, Soft glow |
Each preset has its own flavor:
Soft Pastel Dreams? It's your go-to for a gentle, dreamy look across different photos.
Golden Hour Glow? It's like bottling sunset warmth for your outdoor shots.
Ethereal White Balance? It's all about that soft, airy feel.
Creamy Skin Tones? It's your secret weapon for smooth, natural-looking portraits.
Dreamy Bokeh Background? It's the pro move for making your subject pop.
Vintage Film Look? It's like time-traveling your photos to the good old days.
Light Highlights and Shadows? It's the balancing act for a soft, even look.
Picking a preset? Think about your photo and what you want. Editing portraits? Creamy Skin Tones or Dreamy Bokeh Background might be your best bet.
"Know your image's range before you edit. It's the key to a balanced result", says a Lightroom pro from Pretty Presets.
Remember, presets are just the start. Here's how to make them your own:
Pick a preset that fits your photo.
Tweak settings like exposure, contrast, and clarity.
Use local adjustments if you need to fine-tune specific areas.
How to Use These Aesthetic Presets Well
Using presets can speed up your editing, but it's not just "click and forget." Here's how to make the most of these dreamy presets:
1. Start clean
Apply presets to unedited photos. Existing edits can mess with preset adjustments.
2. Know your tools
Explore each preset's effects. In Lightroom's Preset tab, hover over presets to preview their impact.
3. Tweak for your photo
Every photo's different. After applying a preset:
Check exposure and contrast
Adjust white balance
Fine-tune highlights and shadows
4. Light matters
Presets work best with good light. Shoot in early morning or late evening for best results.
5. Compare looks
Make a virtual copy before trying a new preset. This lets you compare different looks without losing your original edit.
6. Portrait tips
For portraits:
| Adjustment | Action |
|---|---|
| Skin tones | Tweak HSL settings |
| Background | Use Dreamy Bokeh Background preset |
| Overall look | Apply Creamy Skin Tones preset |
7. Don't overdo it
Subtle adjustments often look best.
8. Learn from presets
Study what each preset changes. Look at the Tone Curve, Color panel, and Split Tone adjustments. This helps you learn how to achieve certain looks manually.
9. Batch edit
To apply a preset to multiple photos in Lightroom Classic:
Select the images
Apply the preset to one image
Use "Sync..." to apply to all selected photos
10. Local adjustments
Use Lightroom's local adjustment tools (Brush, Graduated Filter, Radial Filter) to refine specific areas after applying a preset.
"Know your image's range before you edit. It's the key to a balanced result", says a Lightroom pro from Pretty Presets.
Remember: Presets are starting points. The key? Adapt them to your style and each photo's needs.
Wrap-up
Here's a quick rundown of the 7 top aesthetic presets we've covered:
| Aesthetic Preset | Best For |
|---|---|
| Soft Pastel Dreams | Dreamy, ethereal looks |
| Golden Hour Glow | Warm, sunset-like tones |
| Ethereal White Balance | Bright, airy aesthetics |
| Creamy Skin Tones | Portrait photography |
| Dreamy Bokeh Background | Blurred backgrounds |
| Vintage Film Look | Retro-style edits |
| Light Highlights and Shadows | Subtle, natural enhancements |
These aesthetic presets are great starting points, but they're not one-size-fits-all. The magic happens when you tweak them to fit your style.
Want a quick dreamy edit? Try this: dial down Clarity, bump up Contrast, and ease off on Vibrance. But remember: less is often more.
Pressed for time? Preset packs like the Clean Edit Portrait Workflow Collection by Pretty Presets can be a lifesaver. With 35 layerable presets and 25 portrait brushes, you've got plenty of dreamy options at your fingertips.
Don't be shy about mixing it up. Different photos might need different presets. The end game? Finding a look that screams "you" and makes your photos pop.


.png)
