Black and white photography has a timeless appeal, bringing out depth, emotion, and contrast in a way that color images often can’t match.
To master this art form, using the right editing techniques is essential. In this guide, we’ll walk you through everything you need to know about black and white photography editing in Lightroom.
From adjusting tones and contrast to creating dramatic effects, these tips will help you transform your photos into stunning monochrome masterpieces, giving your images a classic, striking look.
Here's everything you need to know about high contrast B&W editing in Lightroom:
| Quick Settings | Value |
|---|---|
| Exposure | +0.12 |
| Contrast | +85 |
| Highlights | +10 |
| Shadows | +15 |
| Whites | +10 |
| Blacks | -12 |
| Clarity | +20 |
What you'll learn:
- Converting photos to B&W in Lightroom
- Adjusting contrast and tones
- Using the B&W Mix panel
- Adding local adjustments
- Sharpening and finishing touches
Best photos for high contrast B&W:
| Subject | Why It Works |
|---|---|
| Architecture | Clean lines, strong shadows |
| Portraits | Dramatic lighting, skin detail |
| Street | Natural contrast, shadows |
| Landscapes | Textures, patterns |
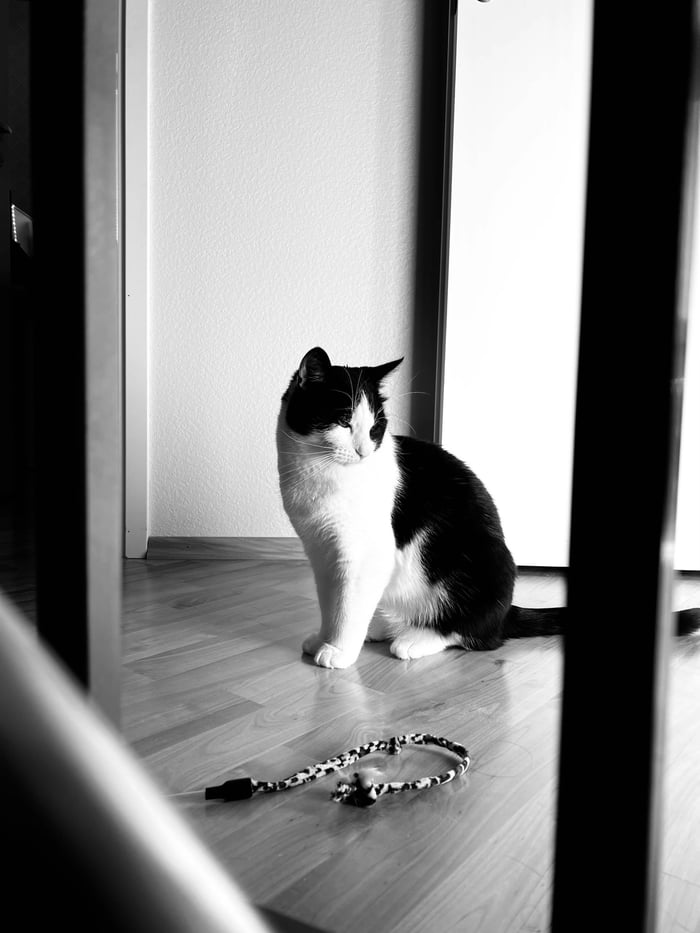
Pro tip: Start with Adobe Monochrome profile, then build contrast using the tone curve. Use local adjustments to dodge (brighten) and burn (darken) specific areas.
This guide covers everything from basic conversion to advanced techniques like split toning and targeted adjustments. Whether you're new to B&W or looking to improve your editing, you'll find step-by-step instructions for creating powerful black and white images.
Featured Video: 7 Step Advanced Black and White Photography Editing in Lightroom
Getting Ready to Edit
Your tools and setup make a big difference in black and white photography editing. Here's what you need:
Lightroom Requirements
You can use either Lightroom Classic or CC. Both handle black and white photography editing well.
| Feature | Lightroom Classic | Lightroom CC |
|---|---|---|
| B&W Mix Panel | Yes | Yes |
| Split Toning | Yes | Yes |
| Tone Curves | Full control | Basic curves |
| Local Adjustments | Advanced | Basic |
Picking the Right Photos
Not every photo works in B&W. Here's what to look for:
- Deep shadows and bright highlights
- Strong shapes and lines
- Sharp, clear details
- Rich tones from dark to light
- Simple, clean layouts
| Subject | What Makes It Work |
|---|---|
| Buildings | Hard edges, dark shadows |
| Portraits | Skin details, expressions |
| Street Scenes | Natural shadows, contrast |
| Landscapes | Surface details, patterns |
Camera Settings to Use
Your camera setup matters. Here's how to nail it:
- RAW Format: Gives you more control in editing
- Low ISO: Stay between 50-100 for clean shots
- Auto White Balance: You'll fix it in Lightroom anyway
- Fast Enough Shutter:
- Without tripod: 1/125 or faster
- With tripod: Up to 15 seconds
| Setting | Pick This | Why |
|---|---|---|
| ISO | 50-100 | Less noise |
| Format | RAW | Better editing |
| White Balance | Auto | Fix in post |
| Shutter | 1/125+ | No blur |
Quick Tip: Switch your viewfinder to B&W mode (if you can) while shooting RAW. You'll see the contrast live but keep all color info for editing.
First Steps in Lightroom
Start with a virtual copy - right-click your photo and pick "Create Virtual Copy." This keeps your original safe while you work.
Setting White Balance and Exposure
| Basic Adjustment | Action | Purpose |
|---|---|---|
| White Balance | Set first | Base tone foundation |
| Exposure | Lower slightly | Build contrast base |
| Profile | Switch to Adobe Monochrome | Better B&W starting point |
Fixing Highlights and Shadows
Here's how to balance your light and dark areas:
| Slider | Adjustment | Effect |
|---|---|---|
| Highlights | Drop -30 to -50 | Fix bright spots |
| Shadows | Lower to -40 | Add depth |
| Whites | Reduce by 20-30 | Control brightness |
| Blacks | Drop to -30 | Deep shadows |
Setting Initial Contrast
Let's build strong blacks and whites:
| Step | Setting | Result |
|---|---|---|
| Contrast Slider | +100 | Strong separation |
| Saturation | -100 | Pure B&W |
| Clarity | +15 to +30 | Mid-tone pop |
"I boost the highlights with a curves adjustment first. Then I lift the blacks slightly for a subtle fade effect."
Quick Tips:
- Hit the B&W tab in HSL/Color/B&W panel for fast conversion
- Use -4 exposure brush for deep blacks
- Build whites slowly with low flow brush
- Layer brushes for tough spots
Keep your adjustments light - you can always add more later. Think of it like building layers: start with the basics, then fine-tune as needed.
Advanced Contrast Methods
The Tone Curve panel is your control center for image contrast in Lightroom. Here's what you need to know:
| Area | What to Do | What You'll See |
|---|---|---|
| Shadows | Pull bottom left down | Darker blacks |
| Midtones | Push center up | Brighter middle areas |
| Highlights | Push top right up | Whiter bright spots |
Want more control? Hit the Point Curve icon at the top. Now you can add extra points for fine-tuning.
Split Toning Magic
Split toning makes black and white photography POP by adding different colors to light and dark areas:
| Part | Numbers to Use | What It Does |
|---|---|---|
| Highlights | Hue 0-39, Sat 0-30 | Adds warm colors |
| Shadows | Hue 200-234, Sat 13-26 | Adds cool colors |
| Balance | -50 to +50 | Controls which tone wins |
"B&W images come down to tone control - it's all about splitting those colors and tweaking them in the mixer." - Pye Jirsa, SLR Lounge Co-founder
Detail Enhancement
Make your images sharp and clear with these numbers:
| Tool | Sweet Spot | What You Get |
|---|---|---|
| Clarity | +15 to +30 | Better mid-contrast |
| Dehaze | +10 to +20 | More punch |
| Texture | +20 to +40 | Surface details pop |
Power Tips:
- Make an S-curve for that classic contrast look
- Keep split toning subtle (under 30%)
- Stack clarity with local brushes for extra oomph
Want bulletproof contrast? Use these exact points:
- (20, 0) for shadows
- (128, 140) for midtones
- (235, 255) for highlights
These numbers give you strong contrast while keeping all your image details intact.
sbb-itb-b27063b
Making Photos Black and White
Converting photos to black and white isn't just hitting a button. Here's how to do it right in Lightroom:
Black and White Photography Conversion Options
You've got 3 main ways to go B&W:
| Method | Steps | Best For |
|---|---|---|
| Basic Panel | Click "Black & White" at top | Quick, simple edits |
| HSL/Color Panel | Select B&W tab | Detailed adjustments |
| Profile Browser | Choose Adobe Monochrome | Advanced editing |
"If you want to work in Black and White, Adobe Monochrome is your best bet." - Nathan Lomas, Video Presenter
Using the Black and White Photography Mix Tools
Want control? The B&W Mix panel lets you decide how each color turns into gray:
| Color Slider | Effect Range | What It Does |
|---|---|---|
| Blue | -100 to +100 | Makes skies pop |
| Yellow | -100 to +100 | Controls plant tones |
| Orange | -100 to +100 | Affects skin tones |
| Red | -100 to +100 | Changes brick/stone |
Quick Tip: Grab the eyedropper tool, click on your image, and drag up to brighten or down to darken. It's that simple.
Separating Tones
Here's how to make parts of your image pop:
| Area | Adjustment | Why |
|---|---|---|
| Highlights | -15 to -30 | Keeps bright areas in check |
| Shadows | +15 to +30 | Brings out dark details |
| Whites | +15 to +25 | Adds snap |
| Blacks | -15 to -25 | Creates rich shadows |
Make Your B&Ws Pop:
- Start in the B&W panel
- Watch your histogram
- Test different looks with virtual copies
For portraits? Drop those red and orange sliders to smooth skin. Shooting landscapes? Push down blues for moody skies and bump up yellows for brighter plants.
Remember: Your black and white photography conversion will only be as good as your original photo's colors. Strong colors = more control over your final image.
Editing Specific Areas
The Adjustment Brush (hit 'K' on your keyboard) helps you paint adjustments exactly where you want them. Here's what you can control:
| Setting | Range | Purpose |
|---|---|---|
| Size | 1-100 | Controls brush size |
| Feather | 0-100 | Makes edges softer or harder |
| Flow | 1-100 | Controls effect build-up speed |
| Density | 1-100 | Sets maximum effect strength |
Want better edge detection? Just turn on Auto Mask.
Lightroom gives you two main filters for targeted edits:
| Filter Type | Best For | Main Settings |
|---|---|---|
| Graduated | Fixing skies | Exposure, highlights |
| Radial | Creating spotlights | Feather, inversion |
Now, let's talk about dodging and burning - your tools for light and shadow:
| Technique | What to Do | What It Does |
|---|---|---|
| Dodging | Use +1.0 exposure brush | Makes areas brighter |
| Burning | Use -1.0 exposure brush | Makes areas darker |
| Combined | Layer multiple brushes | Shapes the light |
Here's what I did with the Castro de Cabo Blanco photo:
- Added a Graduated filter to the sky (-0.5 contrast)
- Used the Adjustment Brush on rocks (+25 texture, +30 clarity)
- Balanced shadows with targeted burning
Some quick tips to help you out:
- Hit 'J' to see exposure clipping
- Work in circles from the middle out
- Start small with +/- 0.5 adjustments
"Dodging = Lightening. Burning = Darkening." - Rick Ohnsman, Author
Finishing Your Photo
Here's how to add those final touches that make your black and white photos pop.
Adding Sharpness and Grain
Sharpening makes your photos crisp without looking fake. Here are the exact settings to use in Lightroom's Detail panel:
| Setting | Range | Purpose | Recommended Value |
|---|---|---|---|
| Amount | 0-150 | Overall sharpness | 50 |
| Radius | 0.5-3.0 | Edge thickness | 1.0 |
| Detail | 0-100 | Fine detail control | Below 50 |
| Masking | 0-100 | Area protection | 40-60 |
Want to see exactly what you're doing? Hold Alt/Option while moving the sliders - you'll get a black and white view of the effect.
For that classic film look, dial in these grain settings:
| Grain Setting | Purpose | Starting Value |
|---|---|---|
| Amount | Controls visibility | 20 |
| Size | Sets grain scale | 25 |
| Roughness | Adjusts texture | 50 |
Adding Vignettes
Want your subject to stand out? Darken the edges. Here's what works in the Effects panel:
| Vignette Setting | Effect | Suggested Range |
|---|---|---|
| Amount | Darkness level | -15 to -40 |
| Midpoint | Size control | 35 to 50 |
| Roundness | Shape adjustment | -20 to +20 |
| Feather | Edge softness | 50 to 70 |
Best Export Settings
For print-quality black and white photos:
| Setting | Value | Why |
|---|---|---|
| Format | JPEG | Best compatibility |
| Quality | 100 | Maximum detail |
| Color Space | sRGB | Standard display |
| Resolution | 300 PPI | Print-ready |
| Output Sharpening | High | For final polish |
| Resize | Original size | Keep full quality |
Need to export fast? Hit CMD+Shift+E (Mac) or CTRL+Shift+E (PC).
For web and social media:
| Setting | Web Value | Purpose |
|---|---|---|
| Long Edge | 2048px | Social media ready |
| Resolution | 72 PPI | Screen display |
| Quality | 80-85 | Smaller file size |
| Sharpen For | Screen | Display optimized |
Extra Tips and Tools
Create Your Own Presets
Let me show you how to save your B&W edits as presets:
1. Start With Basic Settings
| Step | What to Do | Why |
|---|---|---|
| Reset Settings | Clear everything | Clean slate |
| Set Profile | Pick Adobe Monochrome | Perfect for B&W |
| Fix Lens Issues | Turn on profile corrections | Better image quality |
| Set White Balance | Keep "As Shot" | Better tonal range |
2. Lock In Your Preset
- Hit "Create Preset" in Develop module
- Pick a clear name (like "High Contrast B&W - v1")
- Select only the settings you need
- Click Create
Speed Up Your Workflow
Here's how to cut your editing time:
| Step | Action | Time You'll Save |
|---|---|---|
| Import | Add presets while importing | 2-3 min/photo |
| Basic Edits | Start with Auto tone | 1-2 min/photo |
| Local Adjustments | Set up brush presets | 3-4 min/photo |
| Export | Create export presets | 1 min/batch |
Power tip: The B&W Mix tool is your friend. Click and drag RIGHT ON YOUR PHOTO to adjust specific tones.
For better portraits, try these B&W Mix numbers:
| Color | Amount | What It Does |
|---|---|---|
| Red | +15 to +30 | Makes skin brighter |
| Orange | +10 to +20 | Smooths skin |
| Yellow | -10 to -20 | Adds pop |
Wrap-Up
Here's what makes B&W photos pop:
| Element | Technique | Impact |
|---|---|---|
| Basic Conversion | Adobe Monochrome profile | Clean base edit |
| Contrast Control | Spot vs full-image changes | Better tones |
| B&W Mix | Color slider tweaks | Custom look |
| Local Edits | Brush + gradient tools | Focused fixes |
| Texture Tools | Strong settings | Bold results |
"The principle of creating selective contrast instead of using global contrast is perhaps the single most important principle in black and white photography." - Joel Tjintjelaar, Photographer and Educator
Want to get better at B&W editing? Here's what to do:
| Step | Action | Goal |
|---|---|---|
| Daily Practice | Edit 5 photos | Build speed |
| B&W Mix | Test color sliders | Control tones |
| Local Tools | Focus on skies + faces | Nail spot edits |
| Make Presets | Create 3 styles | Work faster |
4 ways to step up your black and white photography game:
- Crank up texture/clarity/dehaze more than color
- Use the targeted tool for exact changes
- Do basic edits first, then go B&W
- Copy settings between similar shots
Here's the thing:
B&W isn't just about killing the color. It's about building depth through smart adjustments.
"Creating a good black and white image is about a lot more than simply pulling all the saturation out of a color photo." - Anthony Morganti, Video Tutorial Creator


.png)
